12 July, 2022

This REALLY sucks. My dust collection system is finally done. For now.

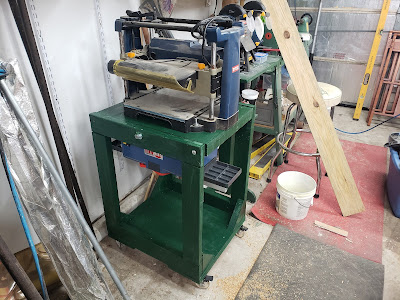
If you have been through the shop tour page, you know that our dust collection system consists of a modified old model green Harbor Freight "Central Machinery" 2 HP dust collector. It has been modified by swapping out the pitifully undersized 9" impeller, with a proper sized 12" impeller sourced from Wen tools, the part is the 3403-22 Turbofan. The dust spewing original so called filter bag was never installed, but instead the filter was replaced with a Wynn 35A MERV15 pleated filter, and to keep the filter as clean as possible while keeping air flow at a maximum I fabricated and installed a neutral vane. I am now pulling fast enough my anemometer can not read the air speed. That's not all that impressive as with the 5" inlet that means I am pulling over 1K CFM at the impeller inlet. 

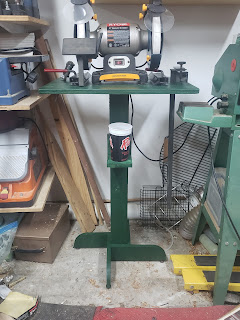
An old photo of the HF DC


I know I am a wierd one. MOST people run even sized dust collection ducting. 4 or 6 inch with the Harbor Freight 2HP dust collector. But even with the upgraded filter and impeller all of the experts I read tell me 6" is just too big, and 4" is too small. And, well 5.5" doesn't exist... 

Cross section of a circle as you may recall is A  = π * r2

Thus.

4" Duct        5" Duct       6" Duct
12.566"        19.634"       28.27"

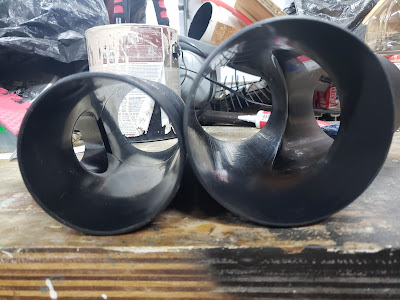
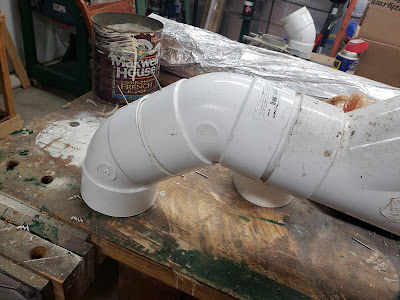
A visual comparison between 4" and 5" ABS fittings.

So... long story short, due to limitations inherent to 2HP dust collection blowers, and contrary to very popular opinion including several dust collector manufacturers, which are notorious for overstating the capability of their equipment, I opted to play it "safe" and went with 5".

Now 5" plastic hose is plentiful, with all those ribs and ridges, which would be coutner productive and I would have been better off with 4" performance wise. 

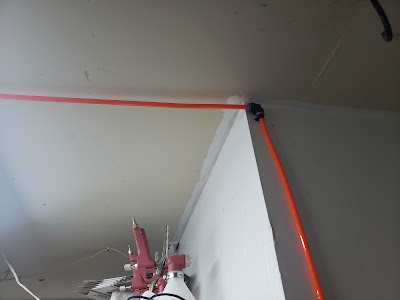
Long story short, which is a rarity for me, but I removed the floor level 4" run, and replaced it with 5" runs about 3' off the floor, and a run up the wall and accross the ceiling, where I have to pull dust up I reduce to 4" sacrificing volume hopefully for velocity.

Components used in the system were bought over a long time of collecting when sales came up on the cheap, or literally castoff material from close by construction projects. But the pieces used at best prices I can find them now. Mind you, I AM going to post affiliate links where I have them, and would GREATLY appreciate you supporting my work by using them if you are doing this project, but with that in mind, I will make every effort to give you the best prices I know of available online. Very often this is NOT with anyone I have affiliates with.  I appreciate your support, but I do what I do to share a budget approach to what can be a very expensive pursuit. I would rather save you a nickel than make $5.00 for myself. That might make me an idiot, but I am a firm believer into the if you bless someone, blessings will come back around to you one way or another.

Harbor Freight 2HP dust collector. Current model is going for $249.00, I bought mine well over a decade ago for a lot less. https://www.harborfreight.com/2-hp-industrial-5-micron-dust-collector-97869.html If I were to do it again today, I would buy the Wen 3403 and call it good.

Turbo Fan for Wen 3403 currently shows for $49.00 which is higher than the $35.00 I paid but still MUCH better than the $150.00+ for the Rikon impeller. https://wenproducts.com/products/3403-022-turbo-fan-for-wen-3403?_pos=1&_sid=f530916dc&_ss=r The web site shows out of stock, which is no surprise as supply chain blah blah. Just keep looking. Again I would have just bought the 3403 if I were starting new.


Wen or Harbor Freight, or any other dust collector with bag filters, you REALLY need to upgrade your dust blowing bag filter, for a fine filtration pleated cartridge filter. The Wynn is considered the top dog in this game, but there are alternatives. Google Wynn 35a alternatives and you will come up with stuff from several vendors. Good reports on the Donaldsons, but you will need to figure out how to attach to the DC, again Wynn is the champ here... Spend a little bit more and remove the headaches.

The neutral vane is simply a piece of, well pipe that you need to form with a special curve in it that forces incoming air into the dust collector to spin along the outer edge of the separator ring, causing the dust and shavings, mostly to drop out of the air stream before moving on to the filter, this keeps the filter clean longer and keeps it from clogging up. Periodic blow downs of the filter with a compressed air blowgun, or even a leaf blower is all the maintenance your filter will need at this point. Sawdustzone.org member LCHIEN posted up his template for making the Neutral Vane for the Harbor Freight dust collector https://www.sawdustzone.org/forum/discussions/shop-setup-layout-and-design/36139-hf-neutral-vane-pictures-reposting and I believe this should also work / fit directly with the Wen as the only difference I can see between the HF and Wen units is the paint color, and the impeller... 

The branch wyes are from Wood River, which I believe is Woodcrafts house brand. Again prices on these have gone up a bit since I got ime a while ago, inflation and all, but currently at $16.49 that is way less than the nearly $30.00 each Amazon is getting for them, or nearly $50.00 each for the metal ones.

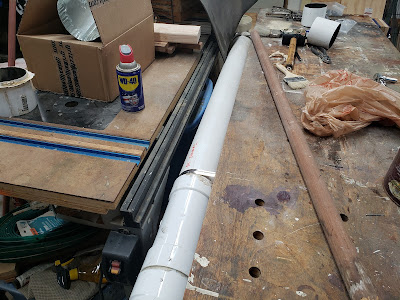
The lowest prices I could find on the aluminum HVAC tape, 5" snap lock duct, and 5" adjustable elbows was all local at Home Depot. I won't post links as your local store, say if you are in Alaska or Hawaii may have higher, or lower prices than mine. My ducting sheet metal parts are not all purchased at Home Depot either. Some of them were what you would consider scratch and dent from local construction sites, 5" seems to be a common branch size on a lot of the houses being built around here, including mine, so contractors tend to prefer to toss and start over on a $5.00 elbow VS. paying somebody $15.00 to straighten it out to use it. Look while driving through the newer neighborhoods, and if you see the stuff, don't be shy to ask!

The 5x4 reducers. I wanted smooth flowing cone reducers. Amazon is looking for $14.40 a piece for the Woodstock International 5x4 cone reducers. Grizzly.com wanted $2.25 + cheap shipping. I went with Grizzly. 

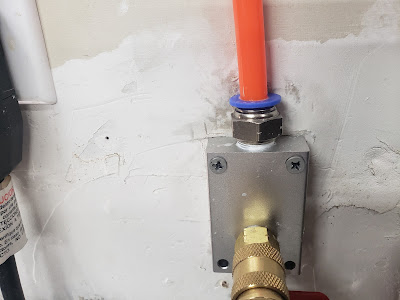
Lastly and this is really a luxury, you CAN use cheap plastic duct strapping, but I opted for proper actual U clamps for my duct work to keep it secured to both the wall and ceiling. 
2 Hole stainless steel 5-1/8" duct straps https://amzn.to/3sf4YNW
2 Hole stainless steel 4-1/3" duct straps https://amzn.to/3h7Bjj8

You will need the following items to complete the install.
I am assuming you have a rivet gun. If you don't  Harbor Freight's $4.99 hand riveter is a great bargain and works fine. https://www.harborfreight.com/hand-riveter-set-38353.html
Along with that you will need an assortment of blind rivets. Again Harbor Freight has the best price on a good sized box of rivets. Many of which you won't need, but the quantity of the sizes you will need are cheaper than just buying a bag or two of just the sizes you need. $6.99 is hard to beat! https://www.harborfreight.com/500-piece-aluminum-blind-rivet-assortment-67668.html

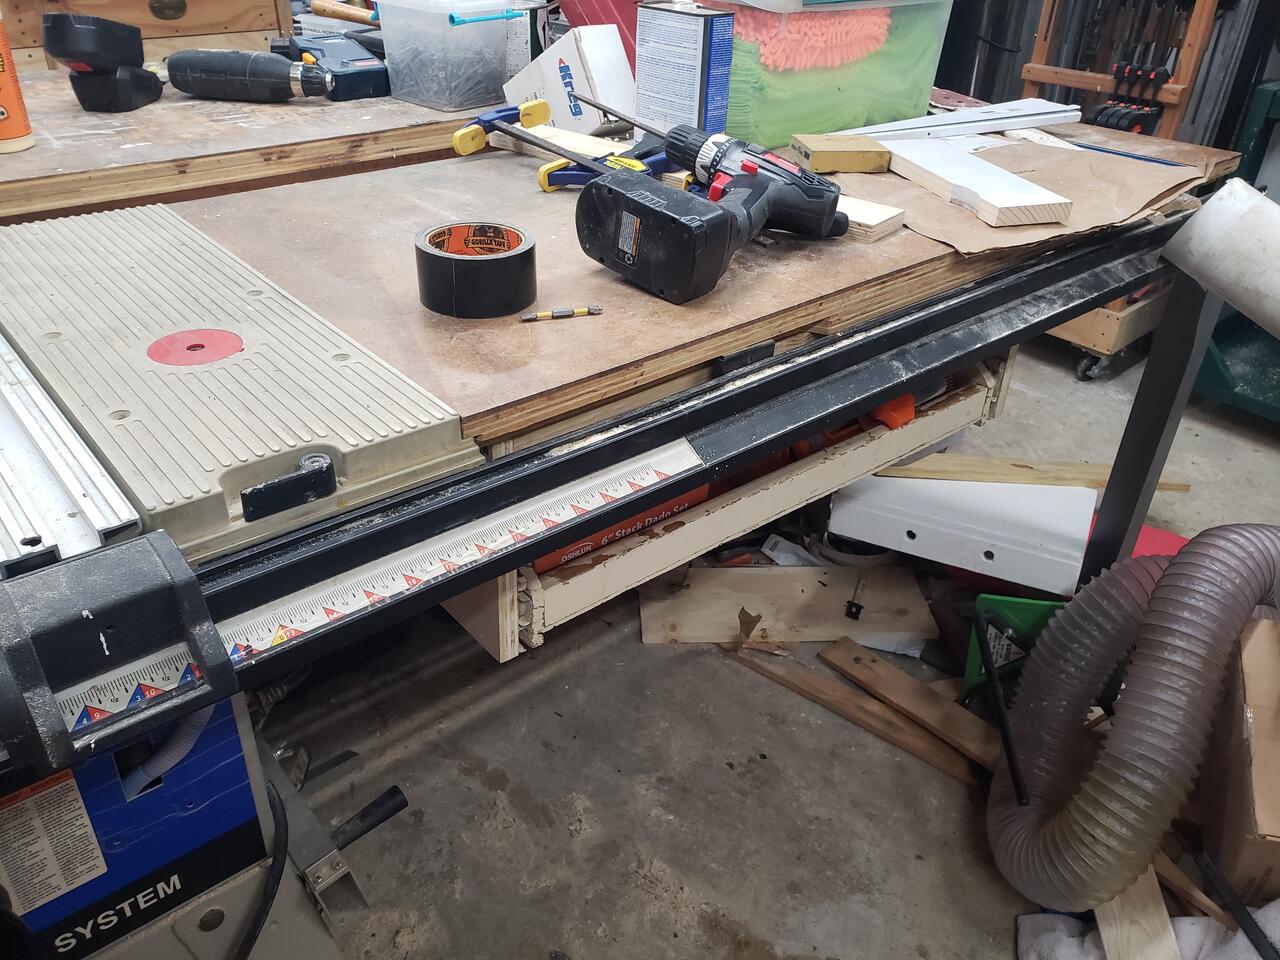
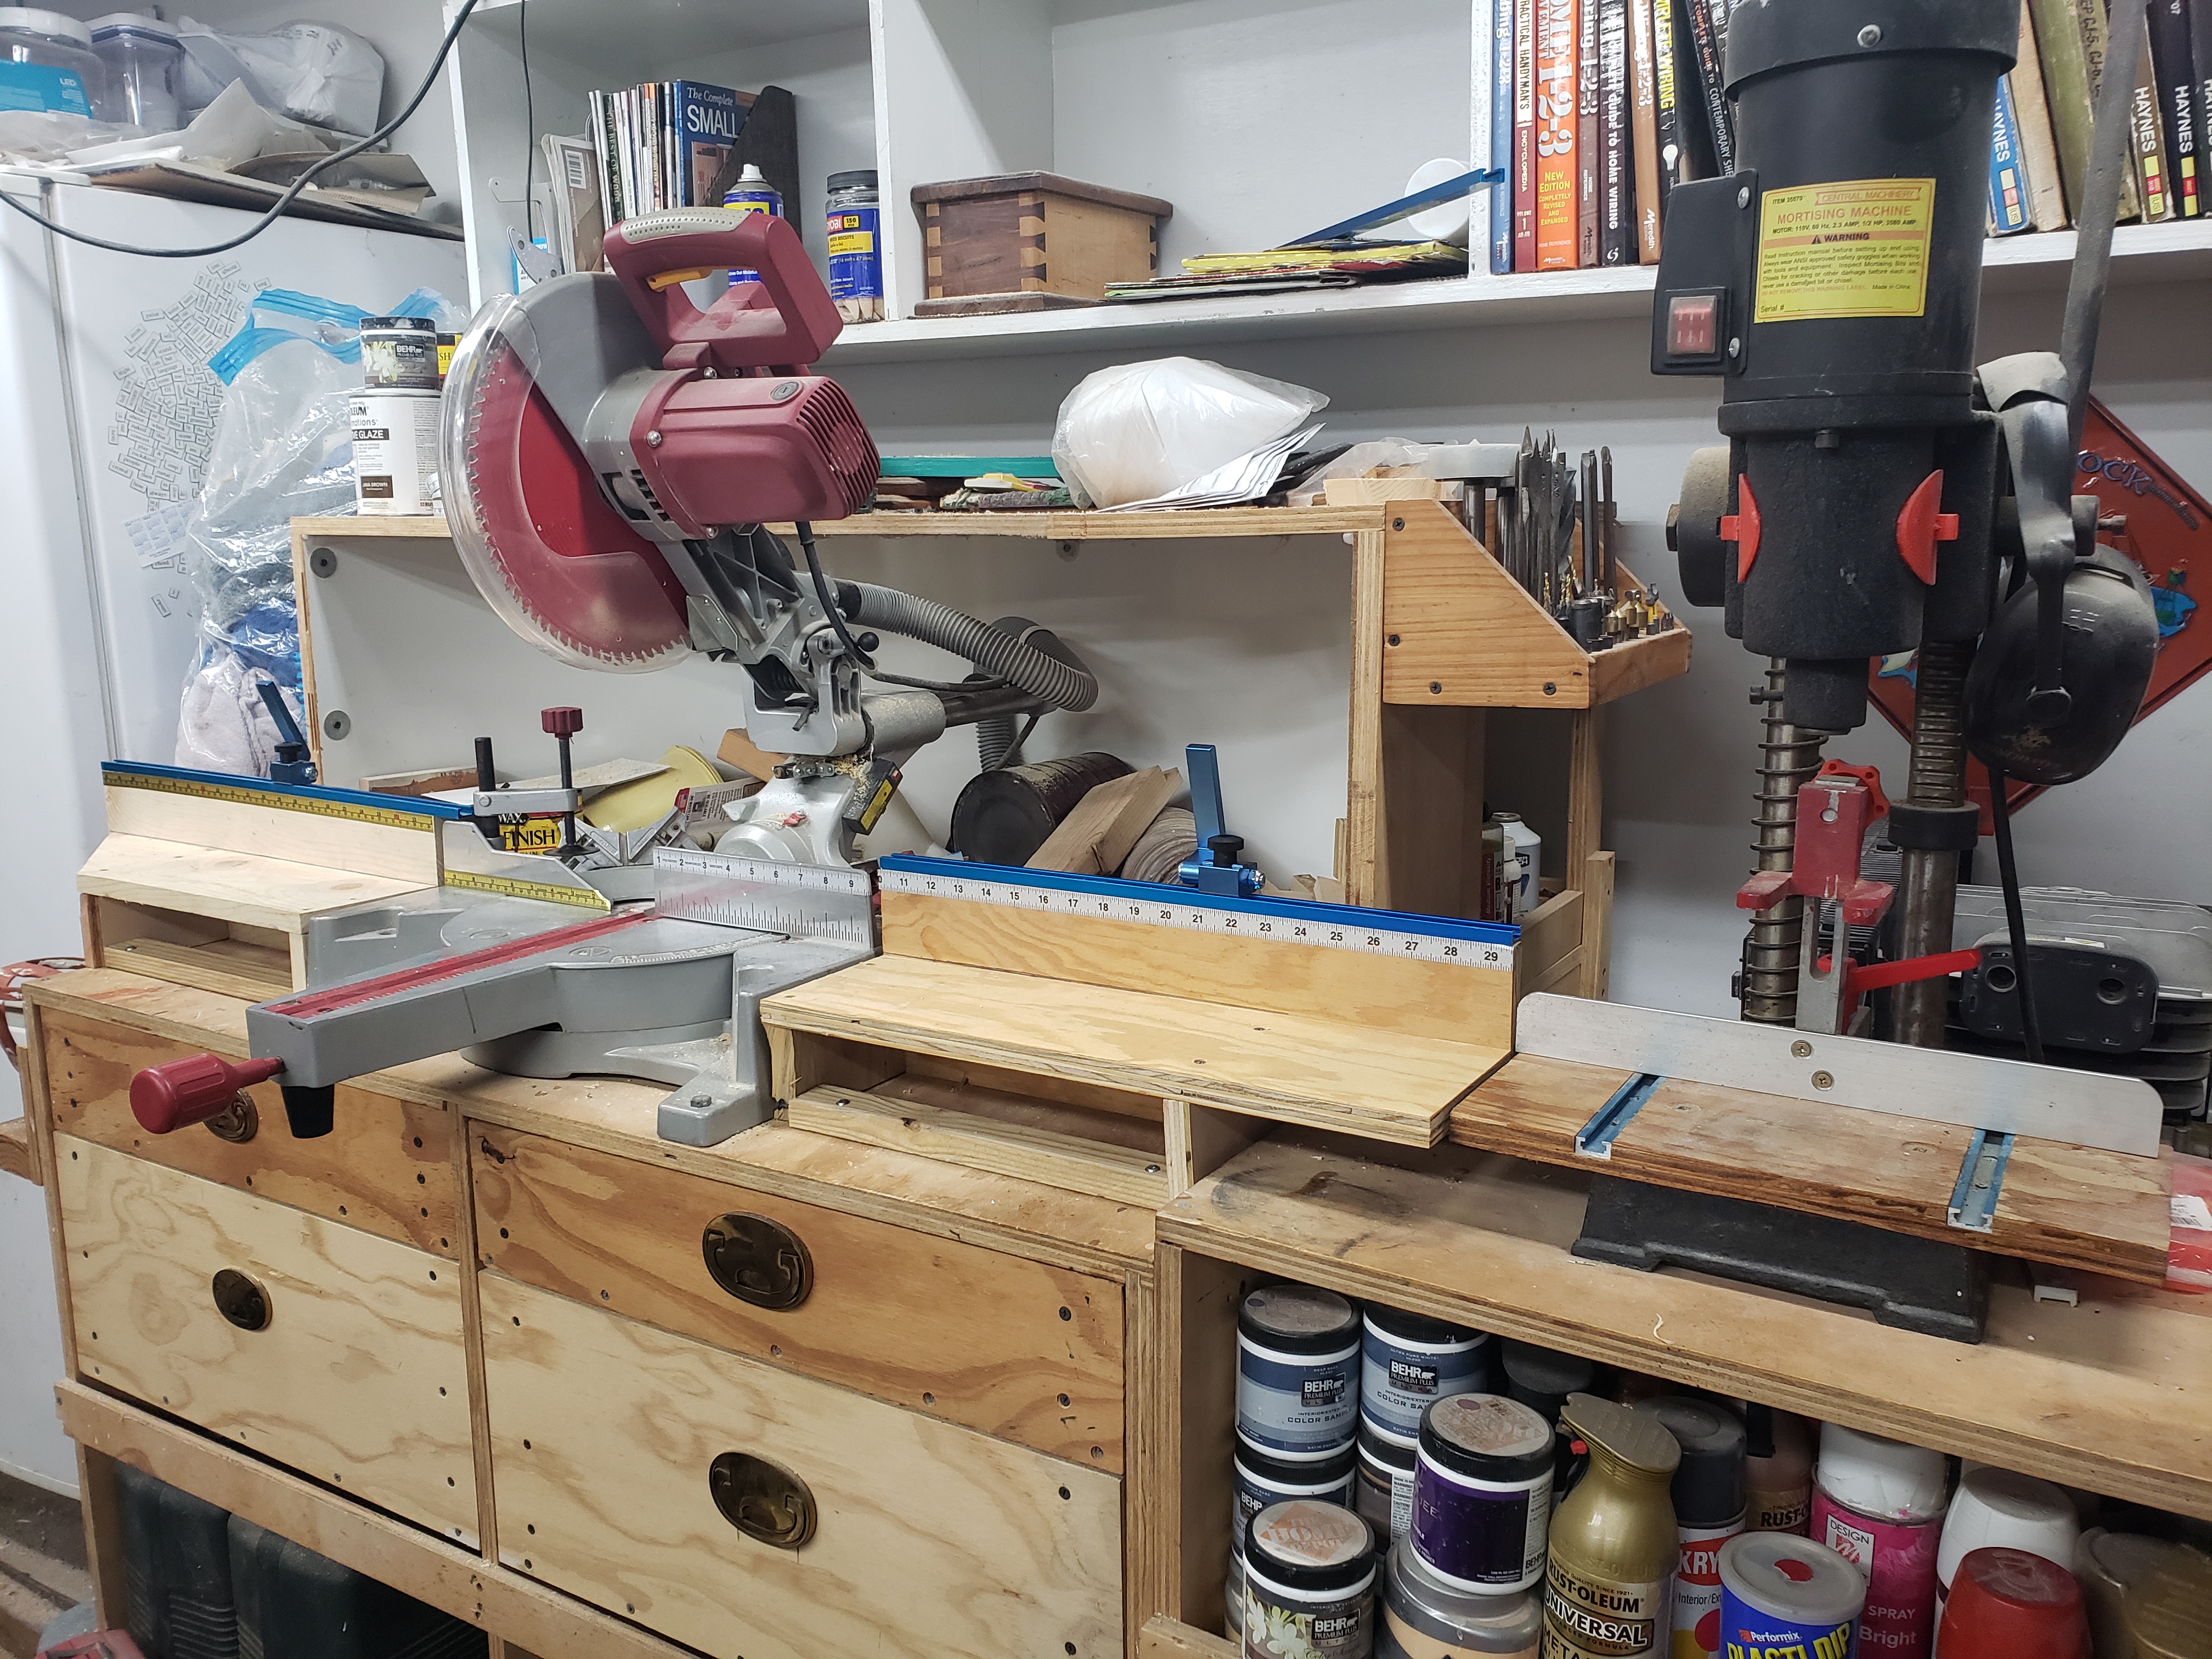
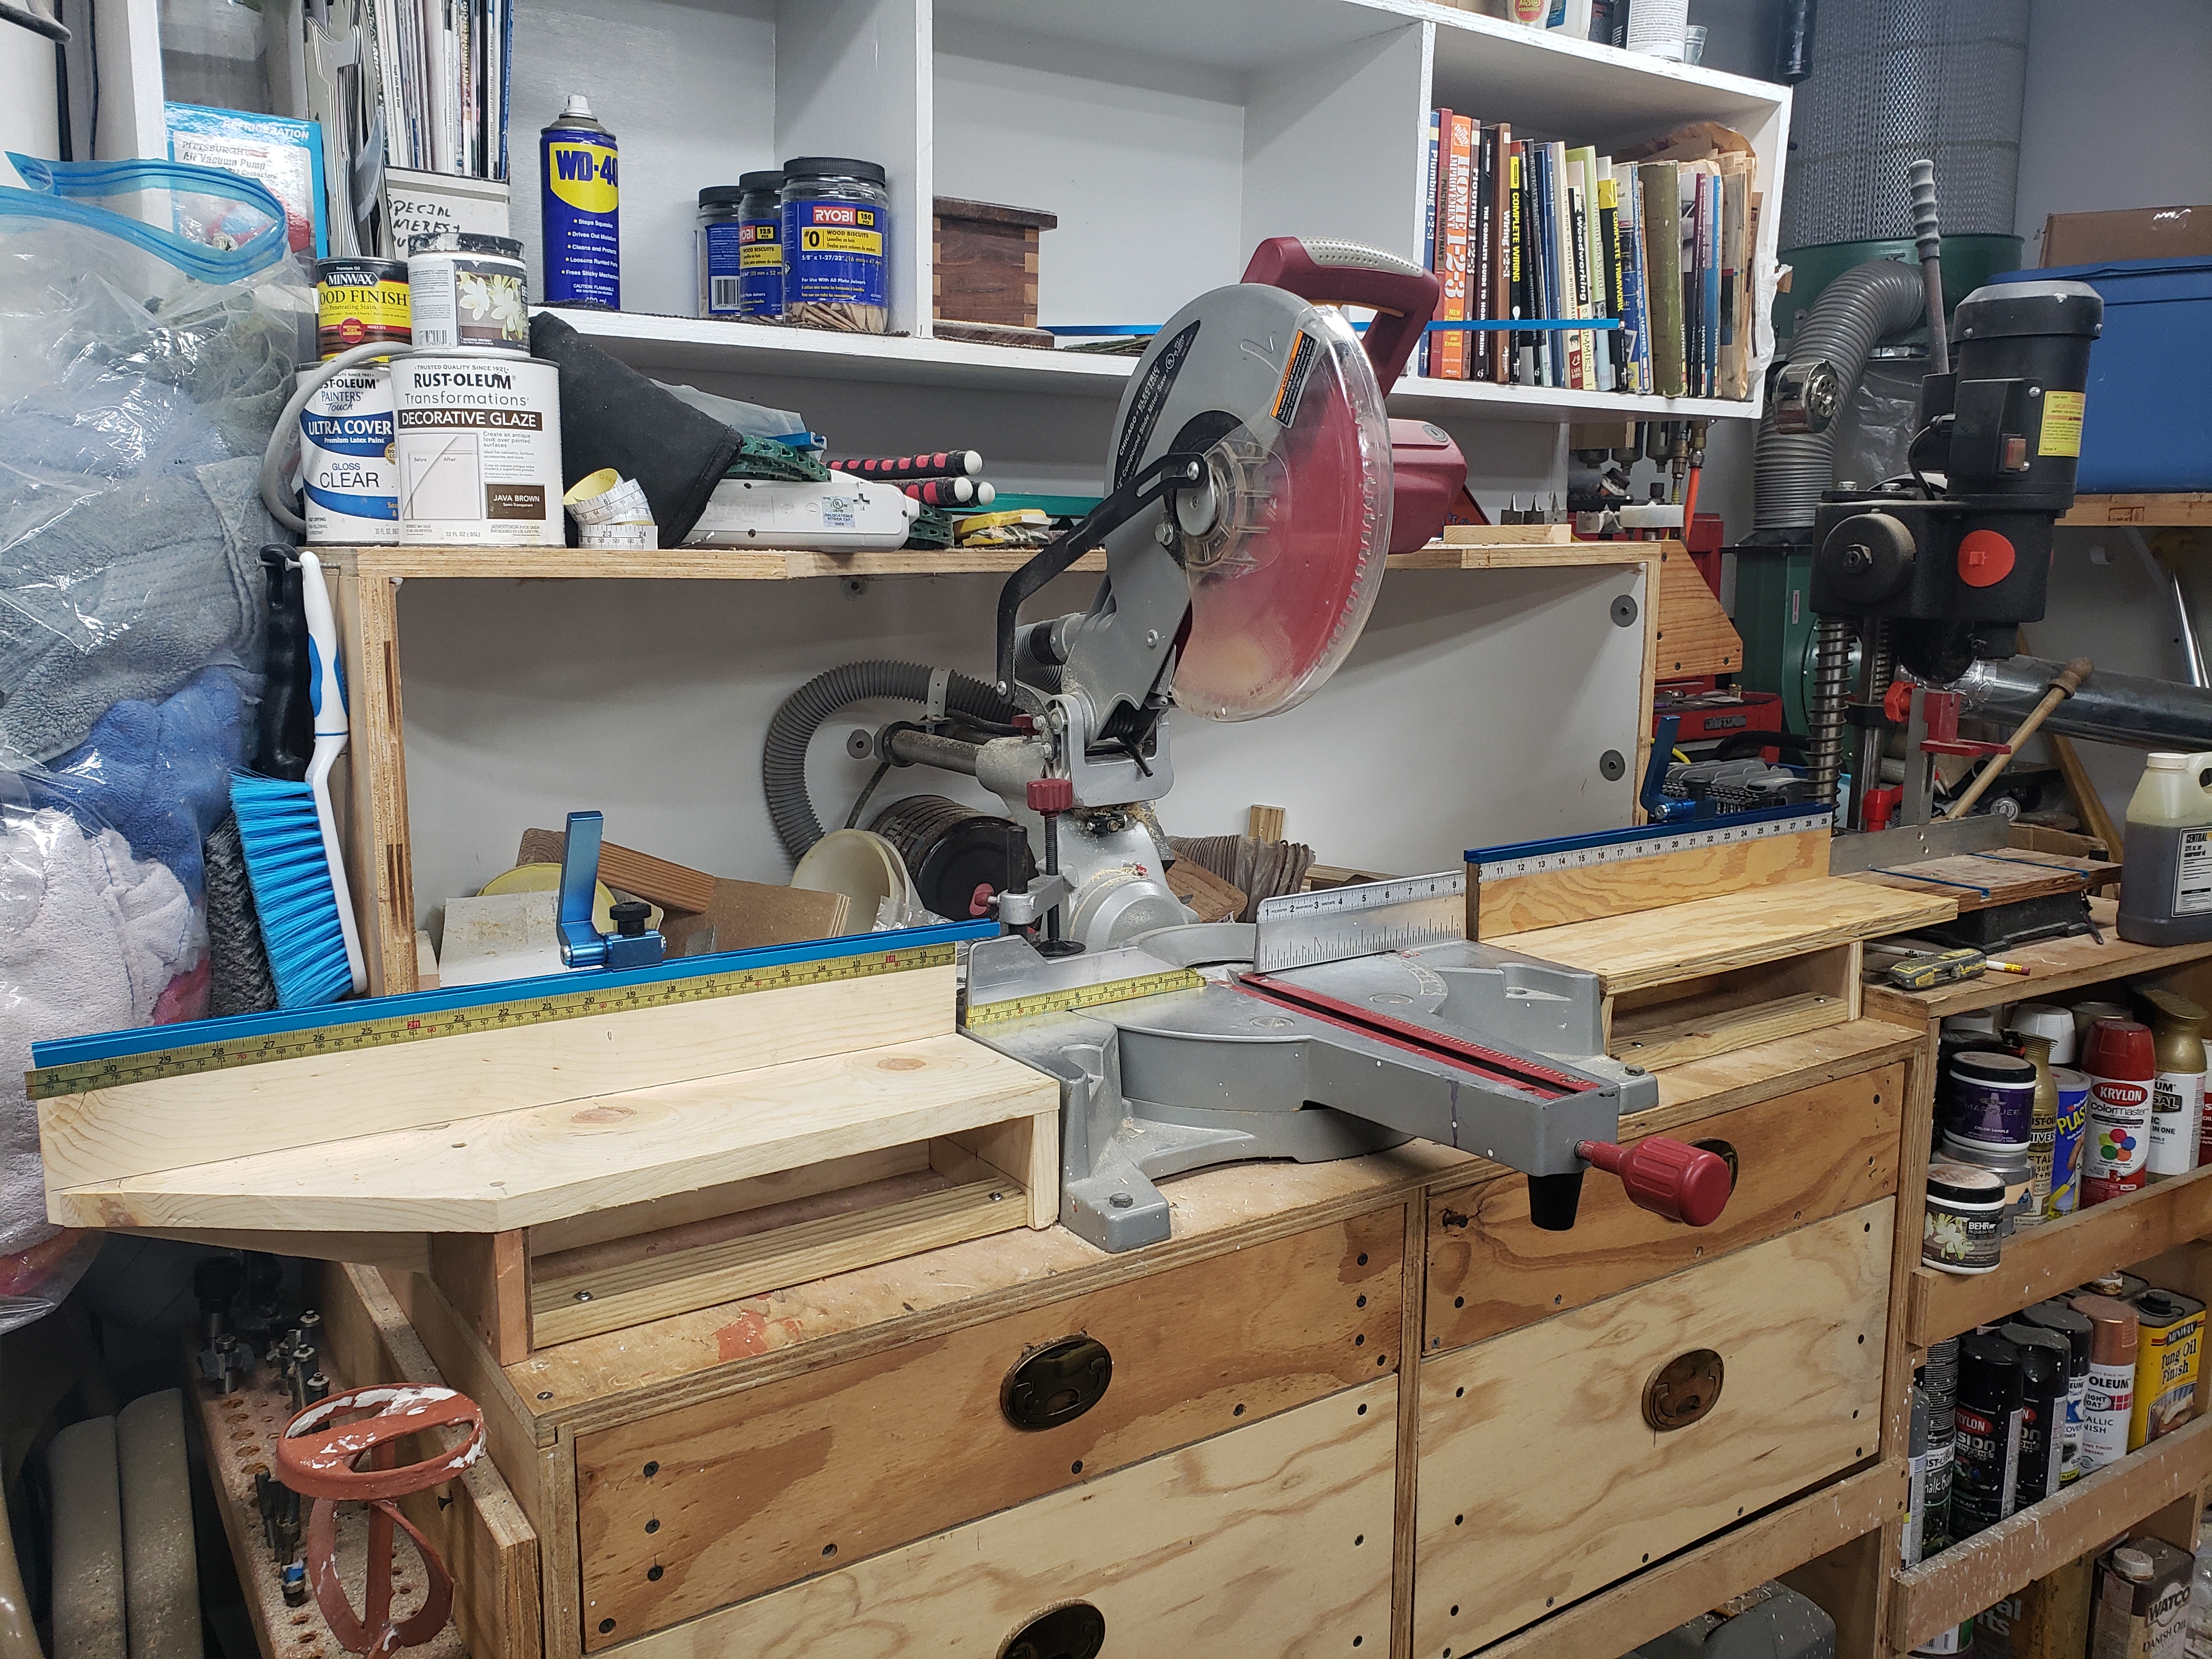
So aside from the remaining issue of trying to figure out how to properly collect the spewing dust off of the sliding miter saw. LOTS of research going on about that. I could design a custom hood for 3D printing, however I would want to sell something like that, and honestly there just isn't that much of a market for a cheap Harbor Freight single bevel sliding miter saw dust collection...

11 July, 2022

3D printing for Shop Safety.

 At some point, not sure when or how, but the little plastic caps that cover the business ends of my mortiser chisels decided to take a permanent break and leave my shop. Most likely got sucked up by the shop vac and are painfully slowly decomposing in the local landfill. Now my mortiser chisel holder holds them in an upright fashion to prvent the auger part of the bit from falling out, right next to my air compressor with the tips of the bits just about forearm / wrist high. Making every single reach for the air compressor on / off switch a bit of an excersize in fear factor.


Not wanting to trade in what years I might have left on this earth for a Darwin award, I felt it best to replace these covers. Unfortunately it's not like these are just an every day thing I can just order on Amazon, oh no they want to sell me the whole chisel set...


But... I DO happen to have a 3d printer, albeit a small cheap one, but guess what, it is perfect for whipping out this sort of thing.


So I go looking on the various STL publishing sites, and sadly nobody has published any print files for these little plastic boxes, but I have calipers, I have Sketchup, and I know how to use 'em...


Design #1. The measurement is there and works well, BUT, only for the 3/8" chisel which I allowed a tiny bit of slop. The 1/2 and 1/4" chisels that I set the inside dimension of the caps dead on to, well, that was dumb.


Design #2. I upsized the 1/4" and 1/2" while keeping the 3/8" cap the way I had it. No joy. Let's try something different.


Designs #3 - 7. Change template in Sketchup from woodworking inches to 3D printing mm. Whip the calipers out again and re-measure everything in MM, transfer the measurements to the drawing. I literally hit the 3/8 cap legth wise dead in the middle... Nailed the 1/2" on the first print, had to fudge around in tenths of a mm to get the 3/8 and 1/4 to fit right but I got it... tenths of a mm, that's not thousandths, but it is an ever so slight nudge...

Well after much trial, fitting, error, fixing, trial fitting blah blah blah, I got them to fit, finally...

I posted the design up on Thingiverse https://www.thingiverse.com/thing:5430191/files so if any of you are up to 3D printing knock yourselves out, I am sharing it with a non commercial attribution license. So feel free to make stuff from it, but don't sell the same said stuff...

The caps fresh off the printer...

Popping them off of the raft is pretty easy, and again, not super tight, but definately a friction fit, at least with mine. Odds are good that chisel sizes may vary. Heaven knows the Central Machinery chisels are not super accurately machined....

No more gouging my arms, or losing the caps!


So now that I have done this, I am posting this up hoping that maybe someone else can benefit from what I have done here....

07 July, 2022

Some simple inexpensive and VERY useful fence clamps!

For all the years I have been woodworking, I have always had to, well, kludge together a system to clamp things like sacrificial fences and stop blocks to my table saw rip fence, well that came to an end today.

These were ordered from Amazon super cheap, 

The Milescraft 4009 Fence Clamps are at the time of this writing selling for $11.99 on Amazon. As is my habit, I offer to you my Amazon affiliate link if you'd like to support me here at no cost to you by simply using me as, well the referrer for your purchase. https://amzn.to/3ysc1o6

The good, the bad, and the ugly.

Well there is no realy ugly, there is only good and could be a bit better.

The good, 

The come in a pair to the package, and the finish on the aluminum block is typical for Milescraft, and I am starting to amass a bit of a collection of their stuff. Sadly it isn't the beautiful blue of Rockler, or other MFGs, but rather Milescrafts almost trademark hammered silver finish. Not unatractive in the least, but doesn't stand out color wise... 

The fence clamps as just freed from the package!

the castings are exactly what I expect. Threaded L hook in an aluminum block, that is machined for the threads, The casting, and machining are every bit what I expect for, well a hardware store L hook. Nothing special but it serves its purpose. The good thing is this hook in particular is nearly fully threaded until just before the bend, so it provides a LOT of range and solid bite to your fence.
The L hook is nicely made, albeit simple.


The clamping rod / knob / pad are every bit as well done, and could just as easily been on a Jorenson or other high quality F bar style clamp were it not for the different knob / handle. The clamping pad has non marring pads that match standard woodworking clamps. Should one fail or get lost, these pads are available most anywhere that sells F bar clamps like Home Depot, Harbor Freight, Lowes, and Amzon. and the tightener is a simple plastic knob on the end that is most likely cast  / injection molded in place.


Should you need to replace the pads for your Milescraft fence clamps, OR standard F bar clamps, Amazon has the Jorgenson Pony clamp pads for cheap. https://amzn.to/3NKECL6


Now these were a 2 pack, and both are not 100% identical. As is typical for machined threads, the furthest in threads of the L rod, in the actual aluminum block, on one of them, they aren't bad per se, but they could be smoother. I am sure over time running in and out they will smoothen up, but for now you can definately feel the burrs in the metal as you turn the L hook in and out in the last say 1/4". It's not super obvious but you CAN see it in the pics... I am fairly certain a good wash through with WD-40 and about 5 or 6 in / out sessions of the hook would clean / smoothen that right out!
If you look close enough you can see the slightly boogered thread.

So... Are the perfect? Nope. I've yet to discover any product of any sort that is perfect. Are they good for what they are? You betcha! I've not laid hands on the Rockler units, but I suspect that blindfolded, if it weren't for the different knob types, I would be hard pressed to know the difference.  And honestly, I think the style knob of the Milescraft lets you get a bit more torque on the clamp, probably a good thing.

Is it a good value? Well at $10.00 to the penny less expensive than a pair of the Rockler units, I think I will deal with these not being blue... 

02 June, 2022

My shop projects since November '21, and what is left to do...

Some folks may already know the what, when where and why, but...

I laid low here, on the forums, my Youtube channel, and honestly in the shop for 4, almost 5 years as I had some life struggles with the family. and then with me dealing with it. 

Simply put starting in 2016, actually late 2015 but the impacts didn't start coming until 2016,  close family members started ending up hospitalized, which wound up in 2018 my wife being long term hospitalized with stress related cardiac issues, and the two of us enduring the loss of 20 friends and family, both our Dads, one of her brothers, aunts, a niece etc…

It was honestly all I could do to keep going on my day job, and ocasionally put out a video here or there. 

But last fall I guess I kind of clicked back into place… I can't explain it other than to say it was a God thing, and he just told me it's time to move on.

In the interim the shop suffered neglect, and honestly a bunch of long term projects that just got put on hold.

Well again, something clicked back in place and it was time to get back with it.

So I now present to you a pictoral of the various projects and upgrades I have done to the shop and its equipment since about October of 2021.

I know I have shown the Harbor Freight dust collector fitted with the Wynn filter somehwere here, it's the old green one and looks like the promo pics on the Wynn website, and the neutral vane is going to be VERY hard to photograph, but here is the Wen impeller during the install process. The install went super easy and was well worth the few bucks and little bit of time it took. What a HUGE difference in dust collector performance. No it is not in ClearVue territory but it picks up where the prior setup left a lot behind… I did get rid of teh Thien 55gallon side inlet barrel separator as it was a big CFM hit, adn the Neutral Vane so far is working well. I was leery of doing that, but after re-reading the Bill Pentz research, and some prodding from LCHIEN at Sawdustzone.org, I went for it.


Next I installed the compressed air piping system that I got as a Christmas present. The manifold setup and filter / regulator / oil and water separators I have had for a while.  As a reminder they allow me to plumb in 2 separate smaller compressors, both Central Pnuematic, an 8 gallon and a 29 gallon oil lubriceated compressor which gives me something like 14 CFM @ 40PSI. The regulator diaphragm sprung a leak and sounded like a whoopie cushion, I found a replacement that works so I am keeping the Central Pnuematic regualtor / filter in place as it works well. I did try a replacement but that did NOT work out.


I also swapped out any fittings in the system that had 1/4” ID, and swapped in 3/8” ID for improved airflow, this meant swapping from Central Pnuematic fittings to Miltons. Worthwhile, but pricey… For now I have 2 of these outlet blocks. The only place I didn’t upsize is because I couldn’t, and that was at my Central Pnuematic hose reel


While I did the install of the piping system, I moved the Central Pneumatic hose reel to the space between the overhead door tracks
I also converted all of the formerly T12 flourescent fixtures to LED ballast bypass tubes.
Also a larger project was the conversion from 4” dual runs to a single 5” main and 4” drops, this is resulting in a much better running system. This meant also that most of the runs are done with galvanized ducting instead of PVC, although the 5x5x5 wye fittings and the reducers are ABS plastic as the metal ones were very hard to find and incredibly expensive.

I resized to fit one of my sister in laws pullout spice drawers after she had to redo her kitchen due to Hurricane Harvey, this went under the extension wing of the BT3100 and serves to house my table saw accessories, jigs, and safety items like push blocks etc…


The band saw recieved its long awaited upgrades. out went the Cool Blocks, in went the Accura roller bearing guides for a MUCH smoother and more stable operation. The upper guide holder for the Accura that houses the micro adjuster for the thrust bearing did NOT fit the Central Machinery band saw, but the yoke that holds the side bearings is a direct fit replacement for the yoke that holds the blocks, so that is how I handled the upper guide. Lower was a direct drop in. The MLCS safety power switch was installed and located on the post, which happened to be drilled perfectly for the mounting screws. I sacrificed an outdoor extension cord to get a sufficient cord for the task at hand. The lower factory dust port was replaced with a larger Jet 2.5” port, and an additional 2.5” port was added to the lower shroud, urethane tires were added but not pictured here, and of course the Kreg Precision Fence has been installed and tested…

And as Heaven as my witness, I have no clue where that miter gauge came from, but it can probably crawl back where it came from….

Of course the previous mods of the G0555 tensioner, riser block, wheel brush etc… are still there…


The drawers and support tables / production stop rig for the miter saw bench / mortiser bench has been done, and now in use… Some minor adjustment to the right side table to get it to line up correctly with the mortiser as the table is 1/16 proud of hte mortiser table. Looks like honestly the mortiser needs to come up…


The wall stacker was killing my back and making me not want to spend shop time working with my equipment, so I built this pair of flip top stands for my bench top tools. The small bits and bobs from the Rigid sander live in a little pegboard hung basket on the side of the stand where I rabbeted in a pegboard side panel. These stands were built from mostly scrap / cutoff lumber and old Harbor Freight casters I had recycled from prior projects. 


And at least for the glut that is now, the last item that has been done since November is the sharpening station, which I have since upgraded with a better platform that has a slit for a jig to hold plane irons / chisels and such for sharpening them and they have really helped me re-establish some badly chipped out Chinese made Stanleys...


So now that is all done, what's left to do?

Thankfully it is a short list, but it is still a tremendous amount of work...
  • I have some wide 3 drawer Sterilite cabinets that fit my cased drills. Make a rolling stand that will straddle my mobile base for the drill press and attach the plastic cabinet to it. Yes it is a cheat, but I'll take it to get it done quick.
  • Build a replacement base for the lathe that integrates a MUCH stronger structure, ballast, and will use at least 4 more of the orphaned drawers my Sister In Law left in my shop...
  • Clean, clean, clean, clean. I did too many projects with the dust collection either turned off, or disassembled and the shop needs a thorough cleaning, sorting and puging of old junk.
  • Take down my clamshell cabinets and shop library, rework the french cleats so that they have a much stronger purchase into the studs and less of a tendency to pull out.
  • Rework the dust hood for the miter saw, change its drop from 4 to 5".

09 February, 2022

The last touches on the compressed air system.


So my last few bits and pieces, some 3/8" MPT x 1/2" Push to connect unions came in today, and I already installed them. I have narrowed down what I have used in my system, and worked out a full parts list for anyone wanting to do an install like mine without making the mistakes I made along the way.

So let's go!

As a refresher, I have a dual compressor system, both Central Pnuematic oil lubricated, 2HP models, one 29 gallon, and one 8 gallon. They are ganged together in a custom manifold that uses a Central Pnuematic 3/8 filter / regulator, FRL connection bracket, and a Central Pnuematic filter / dessicant dryer. 

Harbor Freight is changing lines from Central Pnuematic to Merlin, and I can find no FRL bracket advertised as compatible with the Merlin setup, so if you want to go with Merlin instead of selecting one on say Amazon, just use a 3/8" close nipple.

I went with the dual compressor setup to be able to delivery just over 14cfm at 40psi, which is more than enough to drive anything I am likely to run in my shop, or around my house. Yes a big industrial compressor would be awsome, but that would require a dedicated 30 amp 220v circuit, and a LOT more space neither of which I have or have any interest in adding to my garage workshop.


Now with that being said, let's go through what we have and how we configured it shall we?


Dual compressor input, regulator / filter / dryer / manifold assembly.

I run the dual compressor setup with one compressor, the 29 gallon, plumbed via the piping sytem to the manifold, and the other via a quick connect to the manifold. These connect through 1/4" NPT one way check valves preventing backpressure or leakage in the system or between the comrpessors. These are in turn assembled to 3/8" x 1/4" NPT bushings, and in turn assembled to a 3/8" FxFxM tee. This tee feeds into my Central Pnuematic 3/8" filter regulator, this in turn is connected via an FRL bracket to a Central Pnuematic 3/8" filter / dessicant dryer.  The first filter does particulates, the second filter removes oil etc...  These each are auto draining. On the output side, another 3/8 FxFxM tee, and from here we connect with the first 3/8" MPT x 1/2" push to connect union to get into the piping system, and on the other output, I use for now am using a Central Pnuematic industrial coupler with a 3/8 x 1/4" bushing. I will be upgrading to a Milton 3/8" MPT unit soonest possible.


My regulator / filter / dryer manifold assembly. The main
components are now discontinued and replaced with the Merlin
brand at Harbor Freight.

So here is the shopping list, and I am aiming for having some spares with best per unit price so adjust as necessary.


  1. First the brass tees. Yes I am linking a 5 pack even though I used 3. These are useful, and, well, it is cheaper this way per unit by a lot. GASHER 5PCS Metals Brass Pipe Fitting Barstock Male Branch Tee T Adapter 3/8" NPT Female x 3/8" NPT Female x 3/8" NPT Male 5pk. https://amzn.to/35RDzsl
  2. Milton S-217 1/4" NPT V Style Coupler and Plug Kit - 6 Piece. This will cover 2 hoses, and the secondary input should you opt to not run it in using the push to connect tubing and keep it mobile, https://amzn.to/3uATpSM
  3. Control Devices P2525-1WA Brass Ball Check Valve, 1/4" NPT Female x NPT Male. You will need 2 of these, 1 for each compressor input. These will require bushings. https://amzn.to/3B3PGyd
  4. T TANYA HARDWARE 1/4" x 3/8" Brass Hex Bushing, Female Pipe x Male Pipe, NPT, Pack of 10. https://amzn.to/3rBRLOU
  5. I used the now discontinued Central Pnuematic, now they have the Merlin 3/8" air filter with regulator. https://www.harborfreight.com/38-in-...tor-58178.html
  6. Again Central Pneumatic, the Merlin equivalent is.... 3/8" NPT (F) Dessicant Dryer filter. https://www.harborfreight.com/38-in-...ter-58180.html

Unlike the Central Pnuematic, the Merlin does not appear to have an FRL connection bracket available. If you can find a compatible unit, use it, if not, just connect them with a brass 3/8" close nipple. The FRL mount brackets were really nice on the Central Pnuematics....

The regulator / filter / dryer assembly can be had in a single coordinated assembly on Amazon for a few bucks more than the Harbor Freight units, but and this is goign to sound funny, this is one area that I know Harbor Freight makes a quality unit, I think you would be better off with theirs. But if you insist on going amazon, here is the lowest cost comaprable unit.... https://amzn.to/35Nk8Rs

Now that we are out of the manifold assembly...


Let's move on to the Compressed air piping system.

My piping system is basically a knock off of the Rapidaire, however I looked at the Rapidaire which was considerably more expensive, and itself required lots of parts added to get the kit where I wanted it, not where they want to sell it...  It is a 1/2" OD nylon tubing push to conneect set whcih came with plentiful fittings, 60 feet of tubing which is way more than I will use in my garage, and some just average couplers and plugs. 

I opted for 3/8" MPT unions, and 3/8" MPT couplers to insure I had full flow from the manifold to the hoses. I know I am going to be restricted by the hoses / plugs, but that is something I am just going to have to live with. I wanted no restriction in the path. This also allowed me to eliminate the use of bushings and the added potential point of failure / leakage.

I run the tubing staight up the wall from the manifold, to the ceiling, and make my first bend transitioning to the ceiling. The tubing cut pretty easily with the included cutter, and the push to connect fittings were deemed to be well named by now as they make a good secure connection.


We travel somewhat diagonally accross the ceiling to between the overhead doors, where we tee into the line, and connect to my old Central Pnuematic 3/8" 50 foot self retracting hose reel that is mounted between the overhead door tracks for best coverage of the workshop, and driveway, while taking up minimal headroom. This is an old unit, and the original hose was getting old and started leaking. We replaced the original hose with a Goodyear replacement hose. 


We continued along the ceiling to the front wall, make our second bend to the front wall, and tee down to meet our first outlet block. Both outlet blocks are configured identically. They are Primefit outlet blocks, with the Primefit 3/8" MPT x 1/2" push to connect unions, 1/4" flush pipe plugs, 3/8" MPT Milton couplers, and 3/8" MPT forged ball valves for pressure dump. 


As the tee continues down the front wall to the other side of the overhead door, we make our final bend, to our second outlet block.

Bigatur 1/2" Air Piping System. https://amzn.to/3LgJIyx

Primefit outlet blocks. I used 2. https://amzn.to/3uAdFnd

Glarks 10pc brass 1/4" MPT hex flush pipe plugs. This will close off the unused 1/4" port on the back of the outlet block. https://amzn.to/3GCoNlU

Primefit 1/2" push to connect x 3/8" MPT straight union 4 pack. I used one. https://amzn.to/3oA2Uh3

Antrader 4 pack forged brass 3/8 NPT male x female ball valves 180 degree action. https://amzn.to/3BkAFIB

Milton Industries S-767 HI-Flo V-Style -FeetA,M,V-Feet 3/8-Inch MNPT Brass Body, Single. I used 3. https://amzn.to/3HDwA4u

Central Pnuematic 3/8 x 50ft hose reel. Yes the fittings are 1/4 NPT. So are the hoses. But at least I have full flow up TO it... https://www.harborfreight.com/38-in-...eel-93897.html

NOTE: Harbor Freight appears to be phasing out their pre existing house brands such as Central Pnuematic in favor of their newer lines such as the Merlin Brand, which is reportedly an excellent replacement, but at a higher price point. I am working on a blog post about that move but am not ready to publish it as I am still working out the ideas. The Merlin setup is still less expensive than anything on Amazon though.

Anywhere male pipe threads are, irregardless of factory pipe sealant, recieved several wraps of teflon tape to insure a propoer seal after experiencing multiple failed seal atempts with factory pipe sealed components. 

A spray bottle with soapy water was made up, and once the system was pressurized, EVERY SINGLE JOINT was tested, thoroughly. There are at the time of this writing, ZERO leaks in my compressed air system. 

I still have too many air hoses to think about. both 1/4" and 3/8" ID. The 3/8" ID reinforced polyurethane hoses are far and away my favorites as they are, and stay nice and flexible, are not prone to kinking like hybrid hoses are, and are not super heavy and prone to cracking like rubber hoses are. The disadvantage to the reinforced urethane is that they are not all that abrasion resistant, which is why you never see them in a self retracting hose reel. For use out in the driveway / automotive uses, I pretty strictly use traditional reinforced rubber hoses.

At least in my experience, the hybrid hoses I have tried have simply been the worst of all possible worlds. Poor abrasion resistance, VERY kink prone, very crack prone, the only thing going for them that I can tell is they are lighter than rubber. In my opinion the hybrid air hoses should be avoided at all costs.

06 February, 2022

Thinking about what hasn't worked as well as I had hoped. What to avoid in your shop setup.

So you've seen the shop tours, you've watched countless brag videos on how this or that thing is the best thing since sliced bread...


This is not one of those posts.

On the contrary, this post is to tell you what failed, or at least didn't live up to my hopes. A lot of it is being changed over now, but let's dive right in and hopefully we can get somewhere with this...


#1. My compressed air distribution system. The ganged / dual air compressor setup works great, gives me good max CFM to drive everything I need. The regulator / filter / dryer assembly does what it is supposed to do, how it is supposed to do it. The issues I had were my distribution system relied on, after the output tee of the regulator / filter / dryer setup, I went from 3/8" NPT fittings, to 1/4" so at every fitting we introduced effectively a bottleneck / venturi which is great if we wan to increase speed and atomization of a liquid immediately after, but lousy if I want to maintain volume. The air was distributed with old fashioned rubber hoses that are prone to drying out and cracking, and the overhead hose reel itself was mounted too far back in the shop near the back wall by the comrpessors.

I fixed this by replacing the hoses with a 1/2 push to connect compressed air piping system. Although honestly since pipe is measured in ID and tubing is measured in OD, and this stuff is 1/2" OD they should call them tubing systems. I replaced the 1/4" MPT x 1/2" push to connect fittings with 3/8" MPT x 1/2" push to connect fittings. Sadly the fittings themselves are necked down with a plate that has a 1/4" hex hole in the middle. It took some VERY careful drilling to drill out the plate to 3/8" but my setup NOW has fully 3/8" ID end to end. At the outlet block likewise I upsized the couplers from the standard 1/4" MPT couplers, to 3/8" MPT Milton couplers. They cost a couple of dollars more a piece, but the quality and air flow are worth it.

#2. My old T12 flourescent shop light fixtures were failing. Blowing tubes left and right, flickering, buzzing, and just being a pain. Yep the ballasts were going out.

I could have replaced teh fixtures, but at $20.00 each for cheap ones that I really didn't like, which meant at least $140.00 for new fixtures, or a sale at Amazon for a box of 20 T12 - T8 double or single end powered ballast Bypass conversion bulbs for all of $70.00, I figured I would save 50% and do the upgrade myself, keeping the fixtures I liked. What I wasn't prepared for is just how much brighter the light would be in there. Takes some getting used to.

#3. My dust collector and ducting. Wile many people are fine with 4" mains, I was going to push my DC to as close to Bill Pentz recommendations as possible without going into the ten grand budget territory. I also had my lower run to my workbench and table saw running across the floor causing a tripping hazard. 

How I fixed that? Upgraded the impeller to a Wen 12", removed the Thien separator and using a Pentz neutral vane, long ago tossed the filter bag in favor of a Wynn 35a .5 micron cartridge filter. Upgraded my mains, or more specifically upgradING my mains to 5" and just keeping my final branch runs at 4", this allows me to have ports where I need them.  I have a LONG way to go with this, and am basically tearing out the 4" segments that are going away now. I have the under the bench part moved UP and a vertical 4" running to the ceiling where it will meet up with a branch wye and go into the 5" main. Will likely do a full on post about the ducting once I have it all set up. Probably shoot a video on it.

#4. My tool stacker, just a set of heavy duty shelf standards, and brackets, holding up bench top tools mounted to 3/4" plywood bases meant that I had to lift from over my head for most of my tools, which are not super light, turn which usually meant at least SOME twisting, and then lug the thing to the work bench that put the work surface of the tool too high to actually use well.

My solution for this is also still in progress, and at least 2/3 of the way done. First was the build of the bench grinder / sharpeing station to hold the grinder and griding jigs up solidly and give me a great platform for sharpening my turning tools.  The next step was to design and build a flip top tool cart for the bench top jointer, and lunchbox planer. This is already done and posted in several places. I learned a LOT building that. Thirdly is a second flip top tool cart. This one for the Rigid oscillating edge belt / spindle sander, and scroll saw.  There were LOTS of lessons learned about rushing a job with the first one. On #2, I made certain the lap joints are clean, and tight. No need for screws, although I am planning on at least for the platform to the kick leg using 5/16" dowels, and screws to help secure it though the leg. I am not necessarily Anti Screw, I just want to minimze the amount of hardware for the build. Kind of a personal challenge

#5. My turning tools storage is abysmal. I am keeping them on a plywood platfor on the stand in thier shipping boxes. 

I have some jetissoned drawers from wherever my sister in law dug them up from after Hurricane Harvey. The drawer fronts are really pretty, but the joinery is abysmal. I need to shorten them and am likely to just build out a basic box / cabinet to go above the lathe stands spreaders, and hold my turning tools and accessories. Most likely flock the interior of the thing.

#6. My drill press gobbles up floor space, and really only punches holes. No storage or antying like that. I know over simplified.

I have the Wood magazine plans for the drill press storage cabinet, the kind that rolls over the foot of and straddles the post of a drill press. Now my drill press is on a Harbor Freight mobile base. I need to modify both the base by narrowing it up, and using 2x6s as a platform for the drill press, AND modify the cabinet plans. I am hoping to be able to store all my drilling jigs, and accessories in there, including my hand held drills in their cases being hung from hooks on the sides of the cabinet.

#7.  My table saw and router table parts and accessories are jammed willy nilly into a single tote making it very hard to find the right thing when I need it. 

This is a ways down the road, but I am working on designing a proper mobile base / cabinet for the table saw, with a router enclosure, and organizer / storage drawers. And pull out blade organizers. This is not super high on the list, but it IS on the list... And will likely be done as 2 separate boxes. The box immediately under the table saw, and the box under the extension wing / router table...

Well that's is. I am sure there is more, but that is all I can think of to write about today. 

I am making a video of my build for the flip top stand. Once I get that published I hope you will check it out on my youtube channel!

05 February, 2022

Shop updates progress.

Shop updates progress.

So in late December, I gave a list of shop upgrades, where I was with them, and what was left to do. At that time, what was left pending I beilieve was...

  1. DC duct move / straightening. This is in progress.
  2. Install the band saw tires.
  3. Compressed air hard piping. I have all the stuff and have started installing the outlets.
  4. Lighting. This is for safety and energy efficiency. I need to buy the bulbs.
  5. Finish the miter saw cabinet drawers and doors.
  6. Blown in insulation. I may have to farm this out, but it shouldn't be too terribly expensive.
So let's handle the items one at a time and give you an idea of what is happening.


DC Duct move / straightening. 

I've never been truly satisfied with the way my current dust collection piping setup is run, and I am in process of taking the parts down that bother me, and re-routing them. I am replacing the 4" main duct with 5" which is the maximum size my dust collector is made for, and running, at least for now, until I branch, so for example the workbench and table saw area have an upper, and a lower run. I am running the 5" duct overhead, and branching where the workbench / table saw extension table begin, in order to accomodate pulling from both lines at the same time. 

The first section of 5" being run. I have since tightened up the
hanger and the angles are now correct.

The 4" being reconfigured, yes I know I am hard on my workbench
The joints are locked together with pop rivets for semi
permanence but can be taken apart if needed.

The run between the workbench and the table saw is DONE!

Due to working with what I have, and what is available on the market, I am using a mix of 4" DWV PVC, 2.5"m 4 and 5" ABS plastic dust collection fittings including 5x5x5 ABS branch wyes, and 5x4 ABS duct reducers, and of course 5" snap lock duct and 5" sheet metal adjustable elbows.

I am haing to cut down some of the DWV as I used to have it literally accross the floor, and needed to remove about 4 feet of pipe to make the configuration change. Cutting this on the miter saw without dust collection was honeslty a messy affair. 

The joints on the assemblies that need to be permanently connected, are being drilled and pop riveted. IF for any reason I do need to dissassemble, for example I sell this place and need to relocate, OR I finally build that outbuilding workshop by some miracle of finances, I will be able to drill out the rivets and be good to go.

Sealing of the joints will take place when everything is in place and will be done with aluminum HVAC tape. The metal 5" run shown above has already been done, I honestly need more tape. I will also be taping the seam of the split lock to prevent air incursion from there.

Why did you go with 5" when there are people doing 6" upgrades with Harbor Freight 2 HP dust collectors and Cyclones?

I've worried myself to pieces over this, and had more than a few excitable debates with various fellow forum members on many woodworking forums about this. Many say just pitch the Harbor Freight unit all together, but a true full on proper cyclone and pipe it for 8". Those same folks don't ever volunteer donations to that end.  But the other advice teeters between 5" to get the most out of what my collector was designed for, and upsizing including the inlet in the impeller housing to 6" as 6" will move more air, and that is absolutely true. 6" WILL move more air than 5", quite a bit more. Let me show you the difference between 4" and 5", and you might be able to guess how much different 6" will be...

4" x 2.5" ABS Branch Wye L, 5" x 5" ABS Branch Wye R.

Lastly, the warnings I have seen RE: the loss in static pressure (vacuum) using 6" with a 2HP blower. And YES I know companies like Grizzly etc... have 6" ports on 1.5HP dust colectors, but I am honestly trying to do as much of the Bill Pentz approach as I can with what I have. 

A reminder of the modifications to the dust collector.

In order to accomplish the goals and go with the recommendations, from Bill Pentz I have done the following.
  1. Remove and discard the terrible filter bag that just makes the dust collector a dust pump, and replace it with a Wynn cartridge filer. Mine is a MERV15 35A and is well over a decade old.
  2. The Harbor Freight / Central Machinery 2 HP dust collector has a motor and impeller housing that will easily handle a 12" impeller, but they ship with a 9.75" impeller. I upgraded mine with a Wen 3403-22 Turbofan (impeller). The swap was quick and easy, although I have seen 2 reports on the Redditt woodworking subforum where owners managed to break the flange trying to pull the original impeller. I am assuming this is a casting quality issue with the OE impeller. They were both newer gray machines unlike my old green model. Be prepared to get creative to get the original out if the flange snaps. Once out though, the new one goes in easy...
  3. Neutral Vane. This is basically a piece of duct extension in the inlet ring of the bag holder on the dust collector, it keeps the air moving in a cyclonic motion, and allows dust and chips to fall out of the air stream before it goes up to the filter, keeping the filter cleaner. It is nowhere near as effective as a true separate cyclone separator, or a Thien cyclone. I love the Thien cyclone, I am a big proponent of the Thien Cyclone, HOWEVER separators take a big hot on airflow, slowing your CFM down quite a bit. So I opted for the Neutral Vane Since it does not separate quite as well as a dedicated separator, I take my blow gun on the air compressor, and blow down my filter after every single use... So far so good. The plans for the Neutral Vane for the Harbor Freight or similar sized / cone ramped dust collectors can be found in the post on Sawdustzone.org by LCHIEN. Give him props for his fine work and sharing it please!
 

Install the band saw tires. 

These were a Santa needing to be cost effective with his elves sort of Christmas gift, but desperately needed as my originals are cracking causing a bumping of the blade as it travels. These are inexpensive on Amazon, and a good upgrade to any of the cheap relatvely speaking, Chinese 14" band saws. But yeah, the install hasn't happened yet. I need to do it, but just have had other things going on. Definately go with Polyurethane tires as they are smoother, last longer and far less likely to end up cracking and causing bumping and / or tracking problems.

Compressed air hard piping.

Done.

The system is installed and working. And I am loving it. Another Christmas gift upgrade. I have been wanting a piping system since I started building the shop. It makes air avaialble anywhere in the shop I want it without tripping over hoses. 

The heart of the system is my Central Pnuematic 29 gallon compressor,
I am piped straight out of the regualtor to the piping system with a ball
valve to cut off flow in case of a problem.

I updated my connections to the mainfold setup with the secondary
regulator, filter / dryer, and I have updated since this photo, to
3/8" MPT x 1/2" push to connect fittings to insure full air flow.

Run up the wall, and accross the ceiling, I have since secured
the tubing with tubing clips.

My previously existing overhead hose reel was moved all the way
forward to between the overhead doors. Careful plumbing keeps
everything out of the way of the door tracks / hardware. Sadly this
hose reel, and ALL of them I could find only had 1/4" fittings. 

The outlet block has been reconfigured since this
picture, again to insure full airflow, I got rid of the
bushings and 1/4" MPT pieces, and went with 3/8"
MPT parts, including Milton 3/8" MPT Type V,M,A
couplers. I LOVE my Miltons!


To do.

Finish updating 1/4" MPT x 1/2" push to connect fittings to 3/8" MPT x 1/2" push to connect fittings. I still need one. The fittings came with a restrictor / baffle type plate that reduces the airflow to a 1/4" hex hole for some unknown reason. I managed to drill out 2 of them to 3/8" to return the fittings to full diameter and not be a restriction.  However overdrilling and punching out the spring retainer and the plastic clip is WAY too easy. The fitting MFGs need to redesign these to insure they are made for full flow / diameter of the tubing. The 2 fittings I did manage to get right do not leak. I have another pack of them on the way.

Both outlet blocks have the previously mentioned Milton couplers, and oh boy are they nice. I do however still need one to upgrade the outlet at the manifold by the air compressor. 

Lighting.

The 48" shop light fixtures were blowing T12 tubes, which are hard to come by nowadays, at a freakishly fast rate. I did a ballast bypass upgrade on all of the installed fixtures. These are double ended ballast bypass LED tubes. The amount of light they output is much higher than what the flourescent tubes put out.


Miter Saw Cabinet Drawers

The miter saw cabinet drawers are kind of on hold. Not super important although I need to get it done, but just not super high priority.

Blown in insulation.

Nope. Not yet. This is a time and budget issue. I just don't want to move the stuff against that wall yet...

Not on the prior list. What's been done, what else needs to get done.

Done.

A post was already made on this, but I made a quick and ugly bench grinder / sharpening station, and a flip top tool stand. I have already started on the second. The thought process is I do NOT want to drag my bench tools on and off of, well, anything.

The sharpening station has been moved since this pic to
immediately at the overhead door. I like it better there...

The flip top stand is a VERY basic 2x4 and plywood design.
I am in process of building a second one for my sander / scroll saw.


To do.

  1. Finish up my second flip top stand. Need some more 2x4s, Too cold to go get it today.
  2. Finish up the migration to 5" ducting for the dust collection.
  3. Build a box to house 2 salvaged drawers as a lathe tool storage, and of course moun it above the spreaders on the base of the lathe stand, build and install a ballast enclosure under the spreaders with levellers, and retractable casters.
  4. Build a base cabinet for the drill press that provides storage for my hand drills, drill bits, hole saws etc...

28 January, 2022

The green monster is alive. A flip top jointer and planer rolling cart.

Like many, probably most older folks, I have creaks, groans and pains that have come through a life lived with the bumps and knocks of just living a life. In my case some pretty serious back pain that I mostly learn to live with.
Before it became painfully obvious that the pain was here to stay, I had set my shop up with a Tool Stacker system, made up of closetmaid heavy duty shelf standards and brackets, with 18x24 3/4" plywood mount boards for my bench top tools.  

Those bench top tools are.

  1. Dremel 16" scroll saw. VERY infrequently used.
  2. Ryobi 8" bench grinder with Wolverine jig / skew platform / VariGrind. Used VERY frequently with the lathe. 
  3. Ryobi AP1301 13" lunchbox planer, used frequently with rough sawn lumber.
  4. Sunhill SM-150B 6-1/8" benchtop jointer used frequently with rough sawn lumber.
  5. Rigid EB4424 oscillating edge belt / spindle sander. Used frequntly but it is pretty light...


First things first, I had to get the grinder / sharpening jig squared away and kept close to the lathe so touch ups on my turning tools can happen RIGHT NOW. I took a cast off hunk of 4x4, some 3/4" pine legs for an abandoned valet project, and cobbled up a quick sharpening station / grinder stand, painted it green using Rustoleum brush on hunter green paint, there will be a theme with this stuff, stick with me here...  Now my choice of a full speed grinder I know is controversial. I picked it because OneWay MFG, the folks that made the Wolverine jig recommended it.


So now I was down to 4 bench top tools, I have enough material to fully build one stand, so I need to chose the first two to be put on a stand.

The sander is light, and super easy to move around. So that one is out. 

The scroll saw is kind of heavy, but lighter than either the jointer or planer, and it doesn't get used a lot.

The jointer, and planer, so related functions, AND are close in weight, they seemed to make the most sense for getting put on the first stand.  So they are chosen.

As I mentiond, I needed a flip top stand, well actually two, but had materials to build one... And I have wanted to build these for well over a decade now, I just, well never thought of a simplified 2x4 construction grade lumber build... You always see cabinet grade plywood or better. Not my target for sure!

First go to Sketchup and knock out a design and make sure it all pivots and clears right. No problem... Honestly my build deviated in several key ways form the design due to materials I had on hand. Most notably the 2x4 corner braces were actually 2x6 triangles, the side fill panels that were to be rabbeted in are omitted as the 2x4 stock I had had a lot of, uh, live edge / bark inclusion and there was no way to make a clean rabbet. And the bases feature an additional brace running full width across the front and back between the casters.


Next get to building... Here is sizing up / cut the half lap joints in the 2x4s. No they are not clean, I cut them on the bandsaw WAY too fast and did not to test fits so the joints are sloppy. But they suit the need.


Once the sides were cut out, joined together with glue and screws, and the kicker braces were cut, and joined to insure a 90 degree side. NOTE FOR NEXT BUILD. For my next build I will cut the half laps on the table saw and insure a TIGHT and FLUSH fit instead of the sloppy overlapping fit fo these. I will NOT use metal fasteners, but rather hardwdwood dowels so the only things in there are wood, and glue.

Sized up the pieces for the platform. Filled the backer holes for the bolts with sawdust and a LOT of wood glue, sanded it smooth and set the 1/2" PVC bushing for the 1/2" all thread axle. Then glued up the platform. I know the pic shows Titebond 2, but I actually used Gorilla Glue waterproof wood glue on this build. I took the pic of the TB2 because I was THRILLED I could finally find some locally after the stuff being out of stock for months. 


Trimmed the edges with the router / edge trimming bit.

Set sides back to back, drilled holes for the axle, and the pivot lock pins A.K.A. 5/16 x 2.5
carriage bolts.

Lots of paint, assembly blah blah blah, and it's done.
Gas Machine tool Engineering Machine Toolroom


The pivot works perfectly and it takes up less floor space than I would have thought. All in all a great project. I learned a few things in the build and am going to start on the build for the sander / scroll saw soon.

Contrary to what people keep telling me to go with a floor model, I do want to upgrade my jointer, but I want to go with a Wahuda 10" Benchtop jointer. Unfortunately this will require me to build a new flip top stand with a 4" wider platform so the pivoting platform would be 24" x 22".

So no more lifting and twisting while carrying heavy benchtop machines... 

I can now move on to my next project, which is actually continuing with an existing project. I need to source up some more 3/4" ply, and build new shelves for the linen closet in the master suite, bullnosed, and finish the drywall work in the dressing room and master bath after stripping out the 1980s wallpaper that just did NOT want to give up!