Welcome To The Amish Heritage Workshop!
No, I don't drive a horse and buggy, yes obviously I use modern technology and am on the grid. While those things are indicative of lifestyle choices within the Amish Church, they are obviously not mandatory to claim family ancestry and some things like an extremely strong DIY proclivity, and while not exactly anabaptist, I do claim a strong and guiding Christian faith which does come through in at least some of my projects.
The Workshop:
Welcome to my shop tour. This is going to be a wordy, lengthy read, where I let you in on a full description of my shop space, how I set it up, with what equipment how and why I chose what I did to get it done. So be sure you have some snacks, something to drink and some time to just enjoy, and have at it!
Background and shop logo / makers mark:
I have posted about it in the blog entries, but I felt a real need for a single, linkable page that I can come back and edit when I make changes instead of going back and forth to old forum, and blog posts.
A fair warning to anyone just stumbling on this. When I do a shop tour, I tend to get wordy. So settle in, get comfortable, and bear with me, hopefully I will make this worth your while.
In October 2012, I completed a project, okay the electrician completed it, I more or less watched them do it, where my service was upgraded, my main panel replaced due to hurricane damage, and upgraded, and a feed line currently fed with a 60 amp breaker, but capable of 100 amps, feeding into a sub panel in the garage. The sub panel has 3 primary dedicated circuits, all feeding both 110 and 220V power, one for the dust collection and air compressor, I won't be using both of those at the same time, so that was safe to combine them, the next is a tools circuit, again won't be running say the table saw and lathe at the same time in a one man shop, so safe bet there, and the last one runs HVAC.
The walls and ceiling are sheet rocked, the common wall, and powered outside wall is insulated with R13 fiberglass insulation. The overhead doors were insulated with rigid foam board insulation with radiant barrier foil backing, and expanding foam in the gaps, and the doors themselves were sealed with gaskets. The non powered wall is not yet insulated, I am planning at some point to have blow in insualtion added so I don't have to tear the sheet rock out! The ceiling is insulated with R 30 and the attic is getting a radiant barrier installed.
So now that you have a good description of, well the facility as it were, let's get on with this tour shall we?
Walking in the man door from the house, you first notice the safety and control gear hung from the shop side of the door itself. Here I keep the hearing protection, Safety Glasses, Dispenser for disposable nitrile gloves, first aid kit which has beeen transferred to a metal first aid kit box since this pic was taken, as the plastic box crumbled in the heat. This is basic first aid stuff, medicines are in the house, but bandages etc... are right here, ambient air filter remote control, thermometer, air conditioner remote control, and fire extinguisher.
I have yet to finish the build however there are 3 more upgrades pending to this "Safety Center" They are...

I have my 2 clamshell storage cabinets mounted just above the 4' height of the outlets. The cabinets hold the majority of my hand tools, as well as fasteners such as pnuematic nails, staples, bolts, screws you name it... The one on the right may be sagging on the french cleat as the outlet cover beneath it is bowing. I need to empty it out and double check, fix that if needed.


Below the cabinets is my Harbor Freight 12x36 lathe.
Anyway, back to the "Ttool stacker".
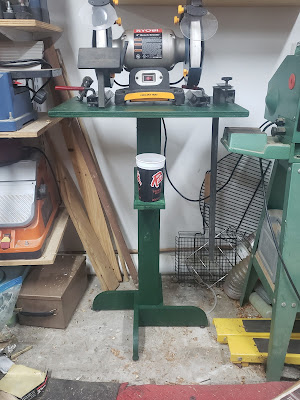
Set up similar to the lumber rack on the other side using heavy duty shelving standards and brackets, I have simple 18x24 inch 3/4 plywood mount boards supporting my bench tools including Rigid sander, bench top jointer, planer, 8" grinder with Woverine jig (now moved), and scroll saw.

The tool stacker DOES work great, and is VERY space efficient, however, as I have gotten older, and earlier back injuries remind me I am not in my 20s any more, I am wanting to get rid of the stacker / lug it around system. I will be replacing the tool stacker instead with a pair of flip top tool stands I need to build. One to hold the sander and scroll saw, the other to hold the jointer, and planer. I need to keep their footprint small to save space, but be able to be wheeled out and used at a whim...
Just to the left of the tool stacker, and above the reverse osmosis system tank is a couple of wall mounted open bins.
The house my extra peg board hooks, as well as. Well... tools for tools. the special spanners etc... for things like table saw, routers etc...
Next is the Harbor Freight 14 inch band saw. This thing has been hot rodded to an extreme manner. I just couldn't afford a Grizzly G0555LX, so I have it fitted with a riser block kit, roller bearing blade guides, cobra coil, a Grizzly quick tension release from a G0555, urethane bandsaw tires, MLCS Safety power paddle switch, custom dual 2.5" dust ports on the lower blade shroud, a Craftsman Professional bandsaw fence. The only thing I dislike about it now is the Craftsman fence. It works. That is all I will say for it... To keep it from deflecting in use I have to put a C block with a C clamp immediately behind it on the table clamping it in place. Don't get me wrong, it works, it's just a bit clunky... I VERY MUCH want to upgrade this to a Shop Fox resaw fence as I believe the table dimensions and mount points between the Central Machinery and Shop Fox are the same, and the Shop Fox IS labelled as universal for 14" band saws. I am planning on getting it, and sending it back if it doesn't fit...
This too is on a Harbor Freight mobile base and is working fine. The pics are old and do not show the switch, or custom ports but rather the old 4" lower wheel guide port that really did NOT work as I had hoped. I have seen others copy this port design and I am hopeful they did NOT copy me...


Lastly on this wall is the Harbor Freight 2 HP dust collector. Like the band saw, the dust collector has recieved more than its fair share of modifications to get the performance I want out of it.
A fair warning to anyone just stumbling on this. When I do a shop tour, I tend to get wordy. So settle in, get comfortable, and bear with me, hopefully I will make this worth your while.
My shop is known as "The Amish Heritage Workshop". Hopefully the reasons are obvious enough.
I mostly picked it as a name to give my shop that served multiple purposes.
First, and foremost it is a tip of the wide brimmed plain hat as it were to my own ancestry / heritage. Next sort of screamed quality wood working, and lastly, I wanted a name that would reference a people of great faith, and I wanted a name / logo would make a nice makers mark.
I have designed a makers mark that I am now using for the shop logo. I like it anyway...
I have an Etsy maker that does rubber stamps that made me a makers mark out of this logo. It should be arriving soon! Yes I am going to go with an ink stamp instead of a woodburning makers mark. Mostly for safety sake, although I'm not gonna lie, I am kind of cheap and didn't want to spend the money on a machined metal makers mark. And this is far and away better than what many large wood product MFGs are doing these days...

I ran across the design of the Amishman straightening his hat in a hip hop sort of gangster pose on a T shirt design somewhere online. I would give credit if I knew where to give it. If anyone can clue me in I would be more than happy to provide it. I have updated / majorly changed their design, and am not planning on using it commercially, just as a way to identify my wood projects to friends and family, so with any luck I won't run afoul of copyright here. I believe I am well within fair usage here, but if I am pushing it a hair... I may need to design my own Amish guy... I was just being lazy.
I have several times grown out my own Amish beard as it were, but my wife isn't all that crazy about gray beard hairs, so she keeps on me until I shave it off...

The silly logo / makers mark I had made...
I ran across the design of the Amishman straightening his hat in a hip hop sort of gangster pose on a T shirt design somewhere online. I would give credit if I knew where to give it. If anyone can clue me in I would be more than happy to provide it. I have updated / majorly changed their design, and am not planning on using it commercially, just as a way to identify my wood projects to friends and family, so with any luck I won't run afoul of copyright here. I believe I am well within fair usage here, but if I am pushing it a hair... I may need to design my own Amish guy... I was just being lazy.
I have several times grown out my own Amish beard as it were, but my wife isn't all that crazy about gray beard hairs, so she keeps on me until I shave it off...
If that expression doesn't say I need wood shop therapy
nothing does!
The shop facility itself:
Now the shop itself, is an attached 2 car garage in a 1980s home, meaning those 2 cars they intended must have been early 80s Toyota Corollas or Honda Civics. Floor measurements are 20' long, including a 2' tall x 24" deep step up shelf, so really 18' of parkable car area, x 18' wide. There are 2 overhead roll up doors making using this space for full size trucks impossible, and even mid size cars difficult. There is a small 2.5' deep x 5.5' wide setback in the rear corner opening up a few more square feet of floor space that backs up to the master suite bathroom. My wife and I are wanting in our remodelling to reclaim that space for a much improved walk in shower. So I need to get used to not using that space in the shop...
Oh and as this IS a garage, the floor slopes, not a lot, but enough to cause wobbly tool base issues. I am working to fix all that... And to top all that off, the floor is concrete, so it is kind of hard on the feet, knees, and in turn my back. I use an assortment of professional cooks kitchen anti fatigue mats, a large red diamond plate looking Craftsman anti fatigue mat, and a set of those brightly colored interlocking foam mats used in kids play rooms that I got from Sams Club that smell like dog now... My wife won't have them in the house any more so out to the shop it went!
The reasoning behind going with using the attached garage is pretty striaght forward. As a 2 car garage goes the space is useless being only 18x18 parking area, with overhead door height just under 7' fully opened. My F150, nor my wifes SUV can't fit, so it won't be doing car duty any time soon. Due to lot size limitations, and HOA rules, as well as city building codes, I can at most, by REALLY stretching the rules, have a 200sq ft dedicated building, meaning a 10x20, with a peak height of 9' and that had to be a skid foundation / portable building. If I poured footers and did a post and beam foundation, I am limited to 10x12 9' peak height. The rules don't make sense to me, especially since LOTS of my neighbors have those screen enclosures that are something like 24x30.... Go figure.. Anyway, if I went with a dedicated outbuilding, space would be much smaller, and running electrical to a portable building would be harder to do...
In October 2012, I completed a project, okay the electrician completed it, I more or less watched them do it, where my service was upgraded, my main panel replaced due to hurricane damage, and upgraded, and a feed line currently fed with a 60 amp breaker, but capable of 100 amps, feeding into a sub panel in the garage. The sub panel has 3 primary dedicated circuits, all feeding both 110 and 220V power, one for the dust collection and air compressor, I won't be using both of those at the same time, so that was safe to combine them, the next is a tools circuit, again won't be running say the table saw and lathe at the same time in a one man shop, so safe bet there, and the last one runs HVAC.
The walls and ceiling are sheet rocked, the common wall, and powered outside wall is insulated with R13 fiberglass insulation. The overhead doors were insulated with rigid foam board insulation with radiant barrier foil backing, and expanding foam in the gaps, and the doors themselves were sealed with gaskets. The non powered wall is not yet insulated, I am planning at some point to have blow in insualtion added so I don't have to tear the sheet rock out! The ceiling is insulated with R 30 and the attic is getting a radiant barrier installed.
HVAC at present is a 12K BTU portable unit air conditioner that is less than ideal. The 12K BTU is fine, but the puny fan doesn't do a good enough job moving / mixing air around to actually do its job. Heating is handled by a 1500w oil filled radiator to keep the chill off if / when it gets cold in coastal Texas. Honestly the 12K BTU BARELY keeps up with Texas temps. I know insulating the remaining wall will help tremendously, but in all honesty, I want to rip it out, and replace it with an 18K BTU mini split AC with heat unit. There are a good number of 19SEER units on the market with pretty easy self installs. The big issue I am going ot have is I need to hide the outdoor unit behind my side fence due to HOA, that means I need at least a 32ft install kit.
The shop tour!
So now that you have a good description of, well the facility as it were, let's get on with this tour shall we?
The safety center:
Walking in the man door from the house, you first notice the safety and control gear hung from the shop side of the door itself. Here I keep the hearing protection, Safety Glasses, Dispenser for disposable nitrile gloves, first aid kit which has beeen transferred to a metal first aid kit box since this pic was taken, as the plastic box crumbled in the heat. This is basic first aid stuff, medicines are in the house, but bandages etc... are right here, ambient air filter remote control, thermometer, air conditioner remote control, and fire extinguisher.
I have yet to finish the build however there are 3 more upgrades pending to this "Safety Center" They are...
- Shop Built fire extinguisher restraint mount. Basically a semi circular bracket mounted around the bottom of the extinguisher with attached hook and loop tape (Velcro) to secure the extinguisher from slopping around when the door is opened / closed.
- Add a 2nd ear muff set / mount. The one that is there is simply a 2.5" deck screw with about 5 wraps of electrical tape over the exposed thread area to protect the ear muffs.
- Pull off the gloves dispenser, take it to the sander and ease over the corners a bit to soften it up. It's just a bit rough if I am not paying enough attention when I reach for nitrile gloves....
The current Safety Center.
Improvements pending!
The cleaning center. And impromptu dowel storage.
Just inside the door, attached to the right wall is a simple organizer I made for holding brooms and dust pans. I seem to have gotten an army of these things and needed to organize them neatly...

Looking up you see the Grizzly G0572 hanging air filter, the factory paper filters only filter down to something like 5, or maybe as good as 2 microns and are expensive to replace. I have swapped in a Penn State Industries 1 micron washable primary filter, although honestly I would feel better with .5 microns or better (MERV 15). WIth the newer 3M pleated filters, I am seriously considering measuing up the unit and seeing if I can get a MERV15 3M Filtrete to go in there, cheapish, readily available, and better protection...
Air cleaning and lighting:
Lighting currently is 7 2 tube T12 4 foot light fixtures. I have gone through the house and upgraded / replaced incandescent and flourescent lighting with LEDs, but the shop lights still need to be upgraded. I tried drop in replacement bulbs from WalMart that stated they were direct drop in T12 replacements, they did NOT work. I am planning instead on going with some ballast bypass double ended bulbs from Amazon to convert my existing fixtures. Yes I know the new LED fixtures are smaller, you don't really need the reflectors yadda yadda yadda, but I like how these mount, and REALLY dislike how the LED shop lights I Have seen mount, and I want to stick with the 48" tube format... I guess I am old fashioned.
Grizzly G0572 Hanging Air Filter with Remote

Grizzly G0572 Hanging Air Filter with Remote
Yes I am aware there is dust on the output vent side
of the hanging air filter, That is what happens when
you forget to turn it ON when you sand drywall!
Otherwise it works great!
Materials Storage:
As you continue down that same right wall, you see the lumber rack that I mentioned before, It is a very simple, straight forward affair. It is simply a closetmaid heavy duty shelf standard set with the heavy duty shelf brackets 18.5" deep, the standards are screwed directly to the studs using 2.5" galvanized deck screws in every available mount hole. It is quite sturdy. And right now it is QUITE messy. I need to clear all my junk off of it and start over....

Below the lumber rack is my messy assortment of sheet goods and cutoffs.
Below the lumber rack is my messy assortment of sheet goods and cutoffs.
The sheet goods / cutoff cart I had talked about in my post http://daves-workshop.blogspot.com/2014/04/project-planning-or-how-to-eat-elephant.html is on my very short list of shop projects I need to keep from killing myself.
Past the lumber storage area, I have tote and lawn and garden storage. I am needing to build a shed to get most of that stuff out of the shop. In full honesty, I would love to leave that stuff there, and move the shop to a roughly equal size but dedicated space. No more potting soil, lawn mowers, and bicycles would be nice! But for now, those things are stowed in the shop. I am collecting some VERY large / industrial sized pallets for a 10x12 garden shed build. Yes it is cheap, but it is what my budget can take at this time... I have no qualms with sweat equity...
As we pass the lawn and garden stuff, we are at the overhead door wall, and go straight to the middle divider. We have the HVAC center of the shop. Or at least the current air conditioner. It works, but it is less than ideal. Honestly the portable unit does not provide the cooling its specs claim, because it just lacks the fan / ability to move that much air...
At the time the pictures were taken...
Above the AC and hanging from between the door rails is hanging storage for my large A frame ladder. Simply 2 LARGE bicycle hooks, one run directly into the stud, the other run into a hunk of 2x4 that is in place to lower the hook 1.5" to clear the garage door track bracing. My 10' fiberglass ladder is hung from these hangers.
Between the rails for the door to the left is a simple rope / pulley and eye bolt arrangement holding the 6' ladder to the ceiling. Both are up and out of the way, making for more usable floor and wall space.

Continuing we have a Northern Industrial floor model drill press fitted with a Harbor Freight mobile base. This was a screaming deal on Craigslist. $75.00 for a floor model drill press. It was pretty beat up though. Fasteners missing, rusted, loose pulley, banged up / dented pulley cover etc... The difference in sweat equity made this a fair deal, not a great one...
I set the base wide to stabilize the press and so far it works great! However I created a span between the front and rear rails with, well, hunks of 2x6 the drill press itself mounts on, which causes the stretchers to bow something fierce. I need to create an edge jointed / glued up platform of 2x6s that spans the gaps between the metal corners, and then mount the drill rpess to it. The slope of the garage floor is pretty severe at this point, and thus the levellers on the mobile base are critical!
Between the rails for the door to the left is a simple rope / pulley and eye bolt arrangement holding the 6' ladder to the ceiling. Both are up and out of the way, making for more usable floor and wall space.

I have over the years since this photo was taken, decided to leave the ladders out in the back yard next to the house under the eaves... I was just gobbling up way too much space in the shop, and was always dragging them, well, mostly outside...
I set the base wide to stabilize the press and so far it works great! However I created a span between the front and rear rails with, well, hunks of 2x6 the drill press itself mounts on, which causes the stretchers to bow something fierce. I need to create an edge jointed / glued up platform of 2x6s that spans the gaps between the metal corners, and then mount the drill rpess to it. The slope of the garage floor is pretty severe at this point, and thus the levellers on the mobile base are critical!
When I bought this drill press, the Ryobi DP121L 12" variable speed drill press was being clearanced out, and I wanted one of them, but was a bit too price sensitive even at the clearance price.... It drove me crazy for years until recently I stumbled upon designs for drill press storage cabinets that basically straddle the post. I've not yet built the cabinet, but the idea is to build a cabinet that will straddle over the mobile base, on its own rollers, have at least 2 drawers for drill bits, and drilling accessories, and either door enclosed, or open cabinet storage for my handheld drills.


Floating around the area where the drill press is, unless I rolled it elsewhere, you can find my shop built clamp cart. I house a mess of F style bar clamps, quick grips, pipe clamps, etc... Just a mess of clamps on a quick knock together cart. Works well, just not super pretty. However the pipe clamps coming on and off this clamp rack are a real pain in the butt. Since this photo was taken I have removed the pipe clamps. Just bleh... Anyway, I have a dozen each of 12", 18", 24" and 36" F bar clamps. I have a dozen Irwin Quick Grips in 12", and half a dozen of the Pittsburgh 12" ratcheting bar clamp / spreaders. The Pittsburgh ratcheting are notorious for broken pivot pins on the ratchet assembly that is a fairly easy fix, but I have yet to have one fail. I just don't use too much pressure on them.

Turn to the left and he wall we are now travelling down now is what I call the powered wall, this is where most of the circuits live.
If you look closely to the left wall in the corner between the drill press and lathe you may be able to make out my extension cord winder basket thing a ma jig. I actually have 2 of these. They are called "Wonder Winders" and actually work reasonably well. Sure there is room for improvement in the product, but I like the way they loosely hold the cord, instead of winding it tight around an axle basically creating an inductive heating nightmare... Air flows well through here, and most of the time, reeling the cord back in is WAY easier than manually winding a cord up and trying to find a place to put it... The winder wheel thing could use to be made of grippier rubber material, and there should be some sort of guide assembly that keeps the cord centered on the wheel as it pays into the basket, those could both be very easily addressed by the manufacturer. It IS a helpful shop item, and I really do like them, they certainly are well worth the low price, but it really could be better...
Green Leaf WW-1 Wonder Winder Hand Crank Extension Cord Winder
My rolling clamp cart.
Turn to the left and he wall we are now travelling down now is what I call the powered wall, this is where most of the circuits live.
I have my 2 clamshell storage cabinets mounted just above the 4' height of the outlets. The cabinets hold the majority of my hand tools, as well as fasteners such as pnuematic nails, staples, bolts, screws you name it... The one on the right may be sagging on the french cleat as the outlet cover beneath it is bowing. I need to empty it out and double check, fix that if needed.
The clamshell cabinets when I first re-hung them.
Clamshell cabinet loaded with
my Groz hand planes.
Below the cabinets is my Harbor Freight 12x36 lathe.
The lathe is fitted with a simple plywood shelf that holds my turning accessories.
In progress at the time of this writing is a, well, box / cabinet that will mount to the spreaders on the original stand, and give me 2 recycled drawers for storing lathe tools and accessories / turning supplies. Below the spreaders will be enclosed with an ultra basic plywood enclosure that will hold an 80lb bag of some sort of material, either quickcrete, sand, gravel, something to provide ballast. And lastly this will be laid up on 2 layers thick of 3/4" plywood and a very basic levelling system / mobile base, again to solidify the lathe against that goofy sloping floor.
In progress at the time of this writing is a, well, box / cabinet that will mount to the spreaders on the original stand, and give me 2 recycled drawers for storing lathe tools and accessories / turning supplies. Below the spreaders will be enclosed with an ultra basic plywood enclosure that will hold an 80lb bag of some sort of material, either quickcrete, sand, gravel, something to provide ballast. And lastly this will be laid up on 2 layers thick of 3/4" plywood and a very basic levelling system / mobile base, again to solidify the lathe against that goofy sloping floor.
Now to the left of these cabinets, originally I had a "Tool Stacker" that was a series of 18x24" mount boards, some more heavy duty closet standards, and 18" heavy duty closet brackets that my bench top tools would be housed on until in use, I would pull them downa nd clamp the boards to the workbench and have at it. I still have it mostly in place, but found it very inconvenient to use. In that light, I moved the lathe further closer to the overhead door, not cramped or anytyhing, just using wasted space, and then built a bench grinder stand / sharpening station for my Ryobi 8" bench grinder and Wolverine sharpening jig setup.. This is where I am getting started with my hunter green shop paint kick... I reused the tool stacker mount board, used a hunk of 4x4 post left over from a fence repair job, and a set of legs from an abandoned mens valet project I started for me in the master suite after my wfie and I decided we did NOT like the design I came up with once dry fitting started... It happens. Sometimes these things look better on paper.
Anyway, back to the "Ttool stacker".
Set up similar to the lumber rack on the other side using heavy duty shelving standards and brackets, I have simple 18x24 inch 3/4 plywood mount boards supporting my bench tools including Rigid sander, bench top jointer, planer, 8" grinder with Woverine jig (now moved), and scroll saw.
Clamshell cabinets, lathe, and tool stacker
with bench top tools.
The oscillating sander has since been put up!
I have to remove the belt from the sander to put it on here though.
The oscillating sander has since been put up!
I have to remove the belt from the sander to put it on here though.
Just to the left of the tool stacker, and above the reverse osmosis system tank is a couple of wall mounted open bins.
The house my extra peg board hooks, as well as. Well... tools for tools. the special spanners etc... for things like table saw, routers etc...
Next is the Harbor Freight 14 inch band saw. This thing has been hot rodded to an extreme manner. I just couldn't afford a Grizzly G0555LX, so I have it fitted with a riser block kit, roller bearing blade guides, cobra coil, a Grizzly quick tension release from a G0555, urethane bandsaw tires, MLCS Safety power paddle switch, custom dual 2.5" dust ports on the lower blade shroud, a Craftsman Professional bandsaw fence. The only thing I dislike about it now is the Craftsman fence. It works. That is all I will say for it... To keep it from deflecting in use I have to put a C block with a C clamp immediately behind it on the table clamping it in place. Don't get me wrong, it works, it's just a bit clunky... I VERY MUCH want to upgrade this to a Shop Fox resaw fence as I believe the table dimensions and mount points between the Central Machinery and Shop Fox are the same, and the Shop Fox IS labelled as universal for 14" band saws. I am planning on getting it, and sending it back if it doesn't fit...
This too is on a Harbor Freight mobile base and is working fine. The pics are old and do not show the switch, or custom ports but rather the old 4" lower wheel guide port that really did NOT work as I had hoped. I have seen others copy this port design and I am hopeful they did NOT copy me...
The hot rodded Harbor Freight Band Saw.
Grizzly tension release in the release position.
Grizzly tension release in the set position.
Lastly on this wall is the Harbor Freight 2 HP dust collector. Like the band saw, the dust collector has recieved more than its fair share of modifications to get the performance I want out of it.
A Wynn 35a spun bond pleated filter, a Wen 12" impeller oriented backwards from the HF impeller, too much to think about on impeller design to go into here, was also swapped in...
The other modification to the dust collector is a Bill Pentz recommended neutral vane. The design template by LCHIEN at Sawdustzone.org helped me make quick work of making mine! Thanks Loring! https://www.sawdustzone.org/forum/discussions/shop-setup-layout-and-design/36139-hf-neutral-vane-pictures-reposting
The duct work starts out from the DC inlet to a 5" HVAC 5" elbow set to roughly 45 degrees, a couple of feet of 5" metal HVAC duct, and a second HVAC 5" elbow, again set to roughly 45 dgrees, then it is split 5x4x4 using an aftermarket wye after I broke the HF one, and feeding an upper, and a lower run of 4" thin wall DWV PVC. Blast gates are Lee Valley self cleaning aluminum models. All critical joints are riveted, and it is all sealed up with 3M clear silicone adhesive caulk. HOWEVER, I am migrating to a system where I am heat shrinking the DWV pipe to make a tight friction fit against any ABS fittings I may be joining with. It was an idea I caught from a youtuber that I really like...
The collector sits on a custom built, and very basic plywood and 2x4 scrap stand made from found woods that were tossed into my yard by Hurricane Ike. Chances are this was at one time somebodies roof...
Under the collector stand is one of my 2 air compressors. This one a Central Machinery 2HP 8 gallon compressor which provides 6.3 SCFM at 40 psi. This is plumbed to a manifold via check valves into a common line with my second compressor. This gives me the CFM I need without having to have an overly large air compressor in the shop.

Turn left again and you see the Craftsman tool cabinet, with Proto chest. This is my storage for my mechanics tools, screwdrivers etc...
I purchased this new in 1991 to replace a small Snap On tool cabinet that ended up in a friends storage facility when they went bad on the rent...
Keep going down the wall and you will see hidden behind the big bench is the main air compressor. A Central Pneumatic 29 gallon 2HP compressor. This provides a max airflow of 7.3 SCFM at 40 PSI
I have had it for, well not sure now, maybe 10 years and it has been a beast so far. This too is plumbed into the dual compressor system.

Stepping back from the compressors and looking up, actually by now you have seen it already if you were actually in the shop, you see the hose plumbing that feeds the entire shop clean, dry, oil free well regulated air. It took me a considerable amount of time, and a bit of money to go from a basic air compressor / hose setup spitting wet oily air to a clean air supply. I am running
I come in to the inlet manifold, which is simply a 3/8" brass tee, from top and bottom with the feeder hoses from the compressors, one way check valves insure that pressure does not push back into one compressor or the other. A short 3/8" brass pipe nipple connects to a Central Pnuematic 3/8" Air Filter With Regulator, item #68232, I use a Central Pnuematic 3/8" FRL connection bracket / coupler item #68234, and connect the other side to a Central Pnuematic 3/8" Desiccant Dryer with Oil Removal Filter item #69923, I should mention aside from the lack of powder coating, each of these components appear to be identical to big name brand components. The fit and finish is great, and assuming you get decent O rings (yeah you take risks...) these should work for years no problem. On the outlet side of the dryer / filter assembly we come out with a 3/8" brass nipple, and into yet another 3/8" brass tee, and out with female quick connects top and bottom. The top feeds the overhead hose to the hose reel, the bottom is used for temporary use when I need to connect a second hose for some unknown reason... The dual compressor system is capable of providing a theoretical 13.3 SCFM, which is WAY more than what my greediest tools will use.


The cabinet that the 29 gallon compressor is surrounded by, is a stepped arrangement holding my Harbor Freight mortising machine, and Harbor Freight 12 inch sliding compound miter saw such that the tables and fences work together, and just barely clear the door of the upright deep freeze in the garage workshop...
The section with the mortising machine has a tacked on holder for mortiser accessories, and shelves that hold finishes, strippers etc... It is simply a routed and drilled hunk of 2x4 that is screwed and glued on but boy does it work well!
The main section has a lower section that holds handheld power tools, routers, drills, saws etc...And a series of drawers to hold saw and router accessories. The drawers and door fronts are pending material for completion.
The mortising machine has been modified such that its table is a shop made replacement that used T track and hold downs to complement the OE hold down mechanism which in brutal honesty, is far from the best there is... The 12" slider is the older model, red motor housing 12" single bevel slider that I have attached a shop vac hose to the dust port, and replaced the miserable excuse for stock blade with a Freud Diablo 80T blade that reliably cuts without tearout. While the saw works quite well now, it took me far too much filddling to get it dialed in, and staying there, and it is just stinking huge, I would LOVE it if HF made a 12" slider to have a front rail rig like the Festool, if they could pull it off and make an accurate saw. The big problem at this point is that would likely be considered a premium product at Harbor Freight, and they are climbing the price brackets where they are right there with Rigid and Metabo HPT. I would definately upgrade if they made the saw, made it accurate, and kept the price down. I do not see that happening. For now this will have to do.

Above the cabinet mounted to the wall via a pair of heavy french cleats is a library cabinet built specifically to house manuals,
and woodworking publications.
Originally designed to be open storage, this cabinet is being converted to simple plywood doors to protect the contents.

Just past the miter saw / mortiser bench is what I had to agree to with my wife in order to get the power project done. I moved the large upright deep freeze out of the kitchen and into the shop. I am not super crazy about it being here, but a deal is a deal, so I am sticking with it... This was always in the plan. You can see from my photos that I set up tool / fence depths such that any stock being fed through the mortiser / miter saw was going to clear the freezer no problem. So if I went with a shallower depth slider, I really wouldn't gain anything. I really just need to add table / fence extensions with T track and stop blocks...

I should mention this, if you notice, I used my 6' Johnson level to double check clearances, and alignments of tables. This is an AWESOME level, that has put up with some serious abuse... It is a bit on the spendy side compared to the cheap resin levels, but trust me on this one. It is worth paying extra for this kind of quality!
Johnson Level & Tool 9872-HH 72-Inch Aluminum Box Beam Level
Turn again to the left and now to the center of the shop, and you see the main workbench,
this is a modification of the Fine Woodworking magazine's Get Started in Woodworking bench, with the top built a full 6 feet instead of 5 long.
The height is matched to be 1/8" lower than my Ryobi BT3100 table saw and acts as an outfeed support.
It is fitted with a Central Forge 9 inch quick release vise. When new the quick release was, anything but quick release, the lever would go, but it just would NOT let go. The mechanisms looked like they were coated in cosmoline so I took it back off, hosed it down with automotive brake cleaner, and the lubed the snot out of it with silicone grease, now it works buttery smooth, and I am SERIOUSLY wishing I had bought two!

Walk around the bench and you invariably run into the heart of the shop, a Ryobi BT3100 table saw, loaded up with the Wide Table kit, shop made wide table / router table top, shop built router fence. After all these years I STILL need to get up off my tail and level this thing up. Again goofy slope to the floor.
I can crosscut a full 8' sheet of plywood without breaking it down with the circ saw before. But to be honest, I do NOT want to. It's sort of like wrestling a bear.
Underneath the extension wing is my 12 gallon shop vac, and 20 gallon Thien trash can cyclone separator.

Not pictured, but recently added throughout the shop are a 3 Traffic Master anti fatigue mats, and one HUGE Craftsman version... Helps somewhat relieve foot and back problems from standing on that concrete shop floor!
That pretty much is it for now. A constant spate of storage or usage improvement projects is always in the works, so keep posted here.
I will be updating, often!
The collector sits on a custom built, and very basic plywood and 2x4 scrap stand made from found woods that were tossed into my yard by Hurricane Ike. Chances are this was at one time somebodies roof...
Under the collector stand is one of my 2 air compressors. This one a Central Machinery 2HP 8 gallon compressor which provides 6.3 SCFM at 40 psi. This is plumbed to a manifold via check valves into a common line with my second compressor. This gives me the CFM I need without having to have an overly large air compressor in the shop.
Harbor Freight 2HP dust collector
Wynn 35A spun bond cartridge
Thien 55 gallon separator.
Turn left again and you see the Craftsman tool cabinet, with Proto chest. This is my storage for my mechanics tools, screwdrivers etc...
I purchased this new in 1991 to replace a small Snap On tool cabinet that ended up in a friends storage facility when they went bad on the rent...
Keep going down the wall and you will see hidden behind the big bench is the main air compressor. A Central Pneumatic 29 gallon 2HP compressor. This provides a max airflow of 7.3 SCFM at 40 PSI
I have had it for, well not sure now, maybe 10 years and it has been a beast so far. This too is plumbed into the dual compressor system.
Harbor Freight 2HP 29 gallon compressor
tucked behind mortiser cabinet.
Stepping back from the compressors and looking up, actually by now you have seen it already if you were actually in the shop, you see the hose plumbing that feeds the entire shop clean, dry, oil free well regulated air. It took me a considerable amount of time, and a bit of money to go from a basic air compressor / hose setup spitting wet oily air to a clean air supply. I am running
I come in to the inlet manifold, which is simply a 3/8" brass tee, from top and bottom with the feeder hoses from the compressors, one way check valves insure that pressure does not push back into one compressor or the other. A short 3/8" brass pipe nipple connects to a Central Pnuematic 3/8" Air Filter With Regulator, item #68232, I use a Central Pnuematic 3/8" FRL connection bracket / coupler item #68234, and connect the other side to a Central Pnuematic 3/8" Desiccant Dryer with Oil Removal Filter item #69923, I should mention aside from the lack of powder coating, each of these components appear to be identical to big name brand components. The fit and finish is great, and assuming you get decent O rings (yeah you take risks...) these should work for years no problem. On the outlet side of the dryer / filter assembly we come out with a 3/8" brass nipple, and into yet another 3/8" brass tee, and out with female quick connects top and bottom. The top feeds the overhead hose to the hose reel, the bottom is used for temporary use when I need to connect a second hose for some unknown reason... The dual compressor system is capable of providing a theoretical 13.3 SCFM, which is WAY more than what my greediest tools will use.
My Central Pnuematic 50' air hose reel with feed
hose routed through the 2x2 spacer for the light. The original hose started leaking and has been replaced by a new Goodyear 50' 3/8" ID hose.
My manifold(s), filter / regulator and
Desiccant Dryer / Oil Removal Filter.
Not pictured, nor installed yet, but as my Christmas gift I received an off brand copy of a Rapidaire system that will be used to plumb the shop replacing the crack / failure prone rubber hoses.
The cabinet that the 29 gallon compressor is surrounded by, is a stepped arrangement holding my Harbor Freight mortising machine, and Harbor Freight 12 inch sliding compound miter saw such that the tables and fences work together, and just barely clear the door of the upright deep freeze in the garage workshop...
The section with the mortising machine has a tacked on holder for mortiser accessories, and shelves that hold finishes, strippers etc... It is simply a routed and drilled hunk of 2x4 that is screwed and glued on but boy does it work well!
The main section has a lower section that holds handheld power tools, routers, drills, saws etc...And a series of drawers to hold saw and router accessories. The drawers and door fronts are pending material for completion.
The mortising machine has been modified such that its table is a shop made replacement that used T track and hold downs to complement the OE hold down mechanism which in brutal honesty, is far from the best there is... The 12" slider is the older model, red motor housing 12" single bevel slider that I have attached a shop vac hose to the dust port, and replaced the miserable excuse for stock blade with a Freud Diablo 80T blade that reliably cuts without tearout. While the saw works quite well now, it took me far too much filddling to get it dialed in, and staying there, and it is just stinking huge, I would LOVE it if HF made a 12" slider to have a front rail rig like the Festool, if they could pull it off and make an accurate saw. The big problem at this point is that would likely be considered a premium product at Harbor Freight, and they are climbing the price brackets where they are right there with Rigid and Metabo HPT. I would definately upgrade if they made the saw, made it accurate, and kept the price down. I do not see that happening. For now this will have to do.
Sliding Miter Saw / Mortiser cabinet with dust hood.
Having the port that far back doesn't help!
Above the cabinet mounted to the wall via a pair of heavy french cleats is a library cabinet built specifically to house manuals,
and woodworking publications.
Originally designed to be open storage, this cabinet is being converted to simple plywood doors to protect the contents.
Old photo of library cabinet. Ignore the bench setup
that has been changed, but the cab is pretty much the same.
Just past the miter saw / mortiser bench is what I had to agree to with my wife in order to get the power project done. I moved the large upright deep freeze out of the kitchen and into the shop. I am not super crazy about it being here, but a deal is a deal, so I am sticking with it... This was always in the plan. You can see from my photos that I set up tool / fence depths such that any stock being fed through the mortiser / miter saw was going to clear the freezer no problem. So if I went with a shallower depth slider, I really wouldn't gain anything. I really just need to add table / fence extensions with T track and stop blocks...
A tight fit, but it clears. No issues with stock
hitting that freezer door!
I should mention this, if you notice, I used my 6' Johnson level to double check clearances, and alignments of tables. This is an AWESOME level, that has put up with some serious abuse... It is a bit on the spendy side compared to the cheap resin levels, but trust me on this one. It is worth paying extra for this kind of quality!
Johnson Level & Tool 9872-HH 72-Inch Aluminum Box Beam Level
Turn again to the left and now to the center of the shop, and you see the main workbench,
this is a modification of the Fine Woodworking magazine's Get Started in Woodworking bench, with the top built a full 6 feet instead of 5 long.
The height is matched to be 1/8" lower than my Ryobi BT3100 table saw and acts as an outfeed support.
It is fitted with a Central Forge 9 inch quick release vise. When new the quick release was, anything but quick release, the lever would go, but it just would NOT let go. The mechanisms looked like they were coated in cosmoline so I took it back off, hosed it down with automotive brake cleaner, and the lubed the snot out of it with silicone grease, now it works buttery smooth, and I am SERIOUSLY wishing I had bought two!
There is on the right, and not pictured, an Irwin 6-1/2" Woodworking vise, a very basic unit, again with SYP faces.
Sorry, this isn't a great photo, but you can see a little
bit of the lower shelf I added to the bench. It REALLY
added solidity, and useful storage to that bench.
bit of the lower shelf I added to the bench. It REALLY
added solidity, and useful storage to that bench.
Walk around the bench and you invariably run into the heart of the shop, a Ryobi BT3100 table saw, loaded up with the Wide Table kit, shop made wide table / router table top, shop built router fence. After all these years I STILL need to get up off my tail and level this thing up. Again goofy slope to the floor.
I can crosscut a full 8' sheet of plywood without breaking it down with the circ saw before. But to be honest, I do NOT want to. It's sort of like wrestling a bear.
Underneath the extension wing is my 12 gallon shop vac, and 20 gallon Thien trash can cyclone separator.

The table saw. Yeah another old photo. Ignore the
bench in the background. That is the one that left a while ago...
Not pictured, but recently added throughout the shop are a 3 Traffic Master anti fatigue mats, and one HUGE Craftsman version... Helps somewhat relieve foot and back problems from standing on that concrete shop floor!
Also I have a package of those multi color kids play room mats that come cheap from Sams Club as anti fatigue mats throughout the shop. Anything to make the shop a better place for my old back and feet...
The reason for all the old photos is honestly, the shop is a disaster area right now that I am busy working on cleaning up. I will post pics again once it is cleaned up. I started building this shop in 2005, and, I need to post an update as to what 16+ years of use, and abuse do to a workshop!
The reason for all the old photos is honestly, the shop is a disaster area right now that I am busy working on cleaning up. I will post pics again once it is cleaned up. I started building this shop in 2005, and, I need to post an update as to what 16+ years of use, and abuse do to a workshop!
That pretty much is it for now. A constant spate of storage or usage improvement projects is always in the works, so keep posted here.
I will be updating, often!
Nice shop; I'm jealous! I have to admit, though--although I like the name, "The Amish Heritage Workshop," I would feel a bit disingenuous putting a mark like that on anything I made, especially if I used power tools. If it's just small personal projects, I guess it's no big deal, but if you do start making things commercially it might be a good idea to choose a different name to avoid confusion. Aside from that nitpick, thanks for sharing! I'm looking forward to reading more...it looks like I have a lot of catching up to do here.
ReplyDeleteThanks, and no deception intended in the slightest. In all honesty the shop name was chosen as a tip of the hat to my own family history... Hence the name "Amish Heritage" I was trying to place the emphasis on the latter rather than the former...
DeleteIt might be of interest to folks to know that not all Amish completely shun electricity, and in fact those that do not, actually use power tools, primarily pnuematic tools. It is only the most conservative sects that completely shun all modern technologies.
http://www.amishfamilyvalues.com/amish/amish-electricity/
Not sure if the image link will post here, but here is a picture of an Amish craftsman actually using a corded electric power tool...
http://farm3.staticflickr.com/2402/2229745552_d1f6a2fa5e_z.jpg
This comment has been removed by the author.
ReplyDeleteThis comment has been removed by a blog administrator.
ReplyDeleteAwesome shop Dave. I have a Ryobi BT3100 and really like the picture of the table extension. Could you please tell me how you made it. Especially since it looks like the fence travels the whole distance.
ReplyDeleterobertcbock@live.com
Robert, I bought my saw used from a member of the forum www.bt3central.com (now www.sawdustzone.org), and the wide table kit came with it. I got the legs from Sears Parts but I think they are discontinued. The angle brackets are simple affairs that came with the saw as well as T nuts, and short bolts / thumb knobs. The top is 2 layers of 3/4" Aracuo ply with 1/8" Tempered hardboard laminated. The router table plate is from Rockler, and I used one of their MDF jigs to route the hole, and I SERIOUSLY messed up when I ran the dado for the first miter slot in it, so I filled the hole with oak if I remember right and then cut the second dado and mounted the slot track. During glue up I just had the glue up on my workbench, with 2.4 cauls on top and clamped down to my bench directly...
Delete